
Look at this brave little Crocosmia. All his friends stopped blooming weeks ago – months, even – and here he is, blossoming like it’s midsummer.
Brave flower!


Look at this brave little Crocosmia. All his friends stopped blooming weeks ago – months, even – and here he is, blossoming like it’s midsummer.

Some things are more important than others. I know this to be a fact, in the objective part of my brain. But I am more than an objective brain. I am a human being who has ADHD, and one of the things that means is that prioritizing is hard, hard, hard. I start emptying the dishwasher and note the absence of a sippy-cup lid; search through drawers for the missing lid and discover a set of bag clips I thought I’d lost; take the clips to the pantry to secure poorly folded-over snack bags and notice the broom leaning against the wall; start sweeping the floor, only to arrive back in the kitchen and see the half-unloaded dishwasher. In the moment, all these things seem of exactly equal importance. Prioritizing. I so rarely get it right.
Tuesday was a good day from my perspective. I got at least four “real” things done, “real” being achievements other than changing diapers, getting snacks, nursing baby, fixing small meals, feeding puppy, wiping tears, pouring milk, trimming tiny fingernails, rocking to sleep. You know. Mommy things. Tuesday, I accomplished items on my List of Things to Do, which is an important list that rarely sees check marks. So it was a good day.
It was good until bedtime, when almost-four-year-old Niko, overtired and beginning a cold, decided he would do nothing he was asked. We had started a bath before 8; it was after 9 by the time I closed his bedroom door with a tight “Goodnight, I love you,” and no story. I was exasperated, my neck muscles were tightening more and more until the pain turned to tingling numbness up and down my spine and arms, my head was throbbing like the insides of bongos, and I needed – oh, so badly – time alone. I put Sofia to bed much later than I had hoped and wandered toward the kitchen to can the tomato soup I had started that day. Halfway there, I paused in the living room to lie down on the floor, breathe in the silence, and stretch my tense muscles as I tried to let go of my irritation at my recalcitrant child.
A tiny click. A breath of a sound. A small nose, two bright blue eyes, hesitating at the corner of the hallway. “Niko. What. Are. You. Doing.” I bit off every word, exerting every bit of control not to yell them and some others, too, as I saw my alone time careening off into the distance.
“I just…I just wanted…” he wavered, head drooping. “I wanted…”
“What?” I asked wearily. “Wanted what?” I felt I’d already been wanted nearly to death. I wasn’t sure I could deal with another demand. Water? A book? A stuffed animal? An open door? “What do you want?”
“I just wanted you, Mommy. I wanted to cuddle with you,” he whispered, already backing down the hallway, nose and blue eyes disappearing.
Something about that defeated whisper, the downcast head, the acceptance that he was surely not deserving of a cuddle, cut me to my heart. Forget the “real” things I’d accomplished, the ones still waiting for me. Right then, Niko needed his mom to do her mommy thing. I opened my arms. He ran to me, put his arms around my neck as I lay back down on the floor. I could feel his sharp little ribcage dig into mine, his head nestled under my chin, his small warm hand on my cheek. His fluttering heartbeat slowed, his tense body relaxed. We cuddled for a few minutes on the floor, whispering about darkness and fear and safety and love, before I stood with his lanky body in my arms, his legs dangling to my knees, hands draped around my neck, to carry him to his bed. I tucked him in, lay down beside him, stroked his head and neck to help him relax into sleep.
Some time later, I opened my eyes, remembering my abandoned soup. I gingerly extracted myself from the cramped little bed, tiptoed to the kitchen, checked the clock. 11:15. The time for canning soup had long passed. I put it into the fridge with a small sigh, surprised as I did that, despite an hour or more on a too-small bed next to a body made primarily of elbows and knees, the pain that had been sending tendrils of numbness through my body had receded on the back of my earlier irritation, nudged aside by cuddles with a small warm boy. As I turned off the lights and checked the locks, tucking the house in for the night, I realized that this was one time I’d made the right choice; gotten my priorities in their correct order. Not all things have equal importance. For once, that night, I got it right.


So much anticipation. The chopping of a full gallon (measured post-chopping) of tomatoes. The stirring. The mouthwatering aroma. And… One lone pint of (incredibly delicious) tomato soup. Oh, and 1/2 pint that the kids and I will eat for tomorrow’s lunch. Note to self: don’t use cherry tomatoes for soup.


Today: chopping tomatoes, simmering soup, picking a heavy bag full of delectably scented grapes for jelly. Tonight: canning soup. Tomorrow: making jelly, if nothing goes awry. Who can say? All I know is that my tomato-basil-grape-scented kitchen SMELLS AMAZING.

On Sunday, I made one of my new favorite breakfasts: oat apple pancakes. Niko and Sofia both love them, and the apples soften enough while cooking that my toothless wonder won’t choke. I’ve been trying these out on the kids for a few weeks, but this was my first time making them for Aaron, who said with pleased surprise, “These are really good pancakes!” Coming from a man who is a much better cook than I am and a tad picky about his food, that was all the confirmation I needed. These are good. They’re easy, healthy, and dairy-free. You can expect to get about a dozen smallish pancakes from this batch.
Dairy is not typically a concern for me, but we discovered soon after having Sofia that she has a milk protein sensitivity, and I’ve had to cut out milk while we’re nursing. So if you’re avoiding dairy too, these are the pancakes for you. If you’re not, feel free to use ordinary milk instead of coconut milk, and melted butter instead of oil. They’ll be very similar.
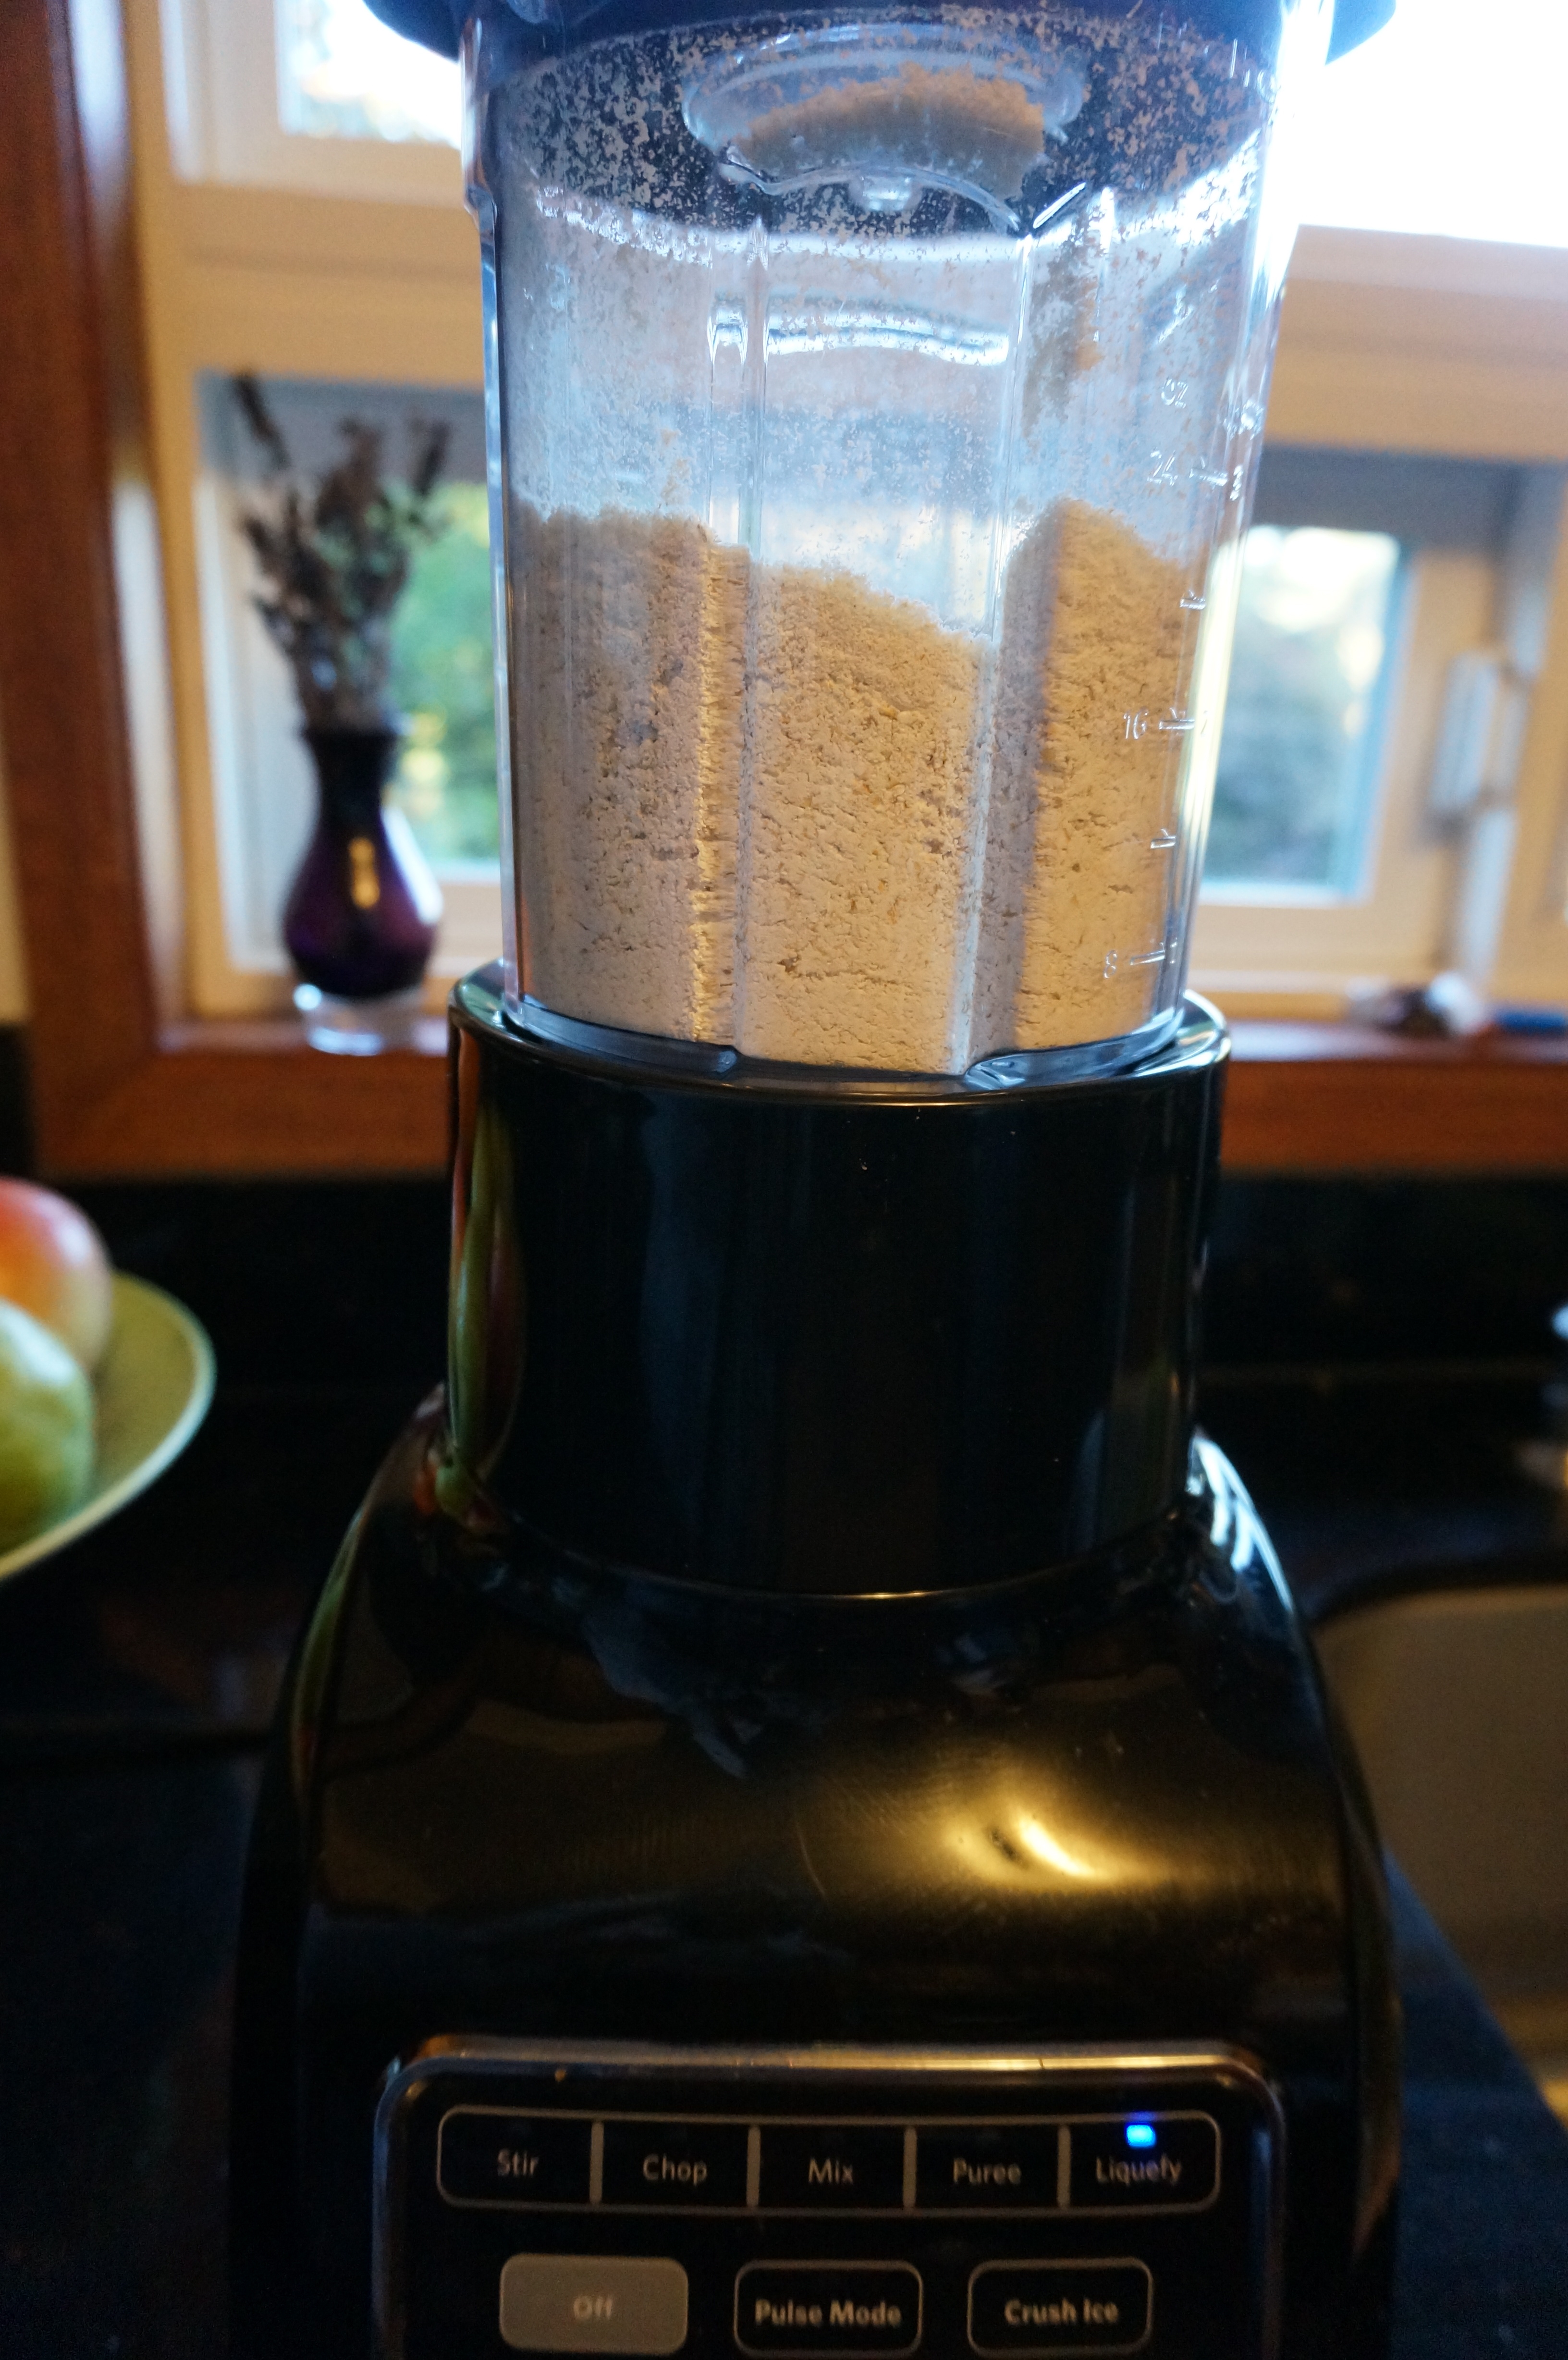
The first thing you need to do is make some oat flour, unless you have some on hand. I don’t really use it that much, and I find it pretty easy just to make it as I need it. To make a cup of oat flour, just scoop about 1⅛ cups of rolled oats into the blender. Blend it on the highest setting, pausing now and then to shake it down or scrape the sides. You can stop when it feels velvety-soft.
Pause here for a rant on heating your pan. When you read baking recipes, the recipe always says right at the beginning, Preheat your oven to… But no one ever says to preheat your pan for frying. Here’s a secret: You need to preheat. If your pan isn’t hot when you start, you get weird pancakes. They don’t rise properly, they stick, and sometimes they spread too far and fall apart when you try to flip them. Now, I know recipes always say to use a hot pan or griddle, but I find that it takes longer than one would expect to really get it heated properly. There you are, pancakes ready to go, bubbles gently rising in the batter as you slowly lose fluffiness potential, waiting for the griddle to heat. I say, no more! Preheat that pan! I always turn the heat on at this point (as I’m ready to start mixing) at a medium-high temperature, and spray it with cooking oil or coat it with butter. By the time the pancakes are mixed, it will be just the perfect temperature. I turn it down to medium just before I pour the pancakes onto the griddle. And no more tossing the first pancakes of the morning into the trash. End preheating rant.

Next, use a medium mixing bowl to thoroughly mix the following dry ingredients: the oat flour (of course), ½ cup of all-purpose flour, 1½ teaspoons of baking powder, 1 teaspoon of baking soda,
and ½ teaspoon of salt.
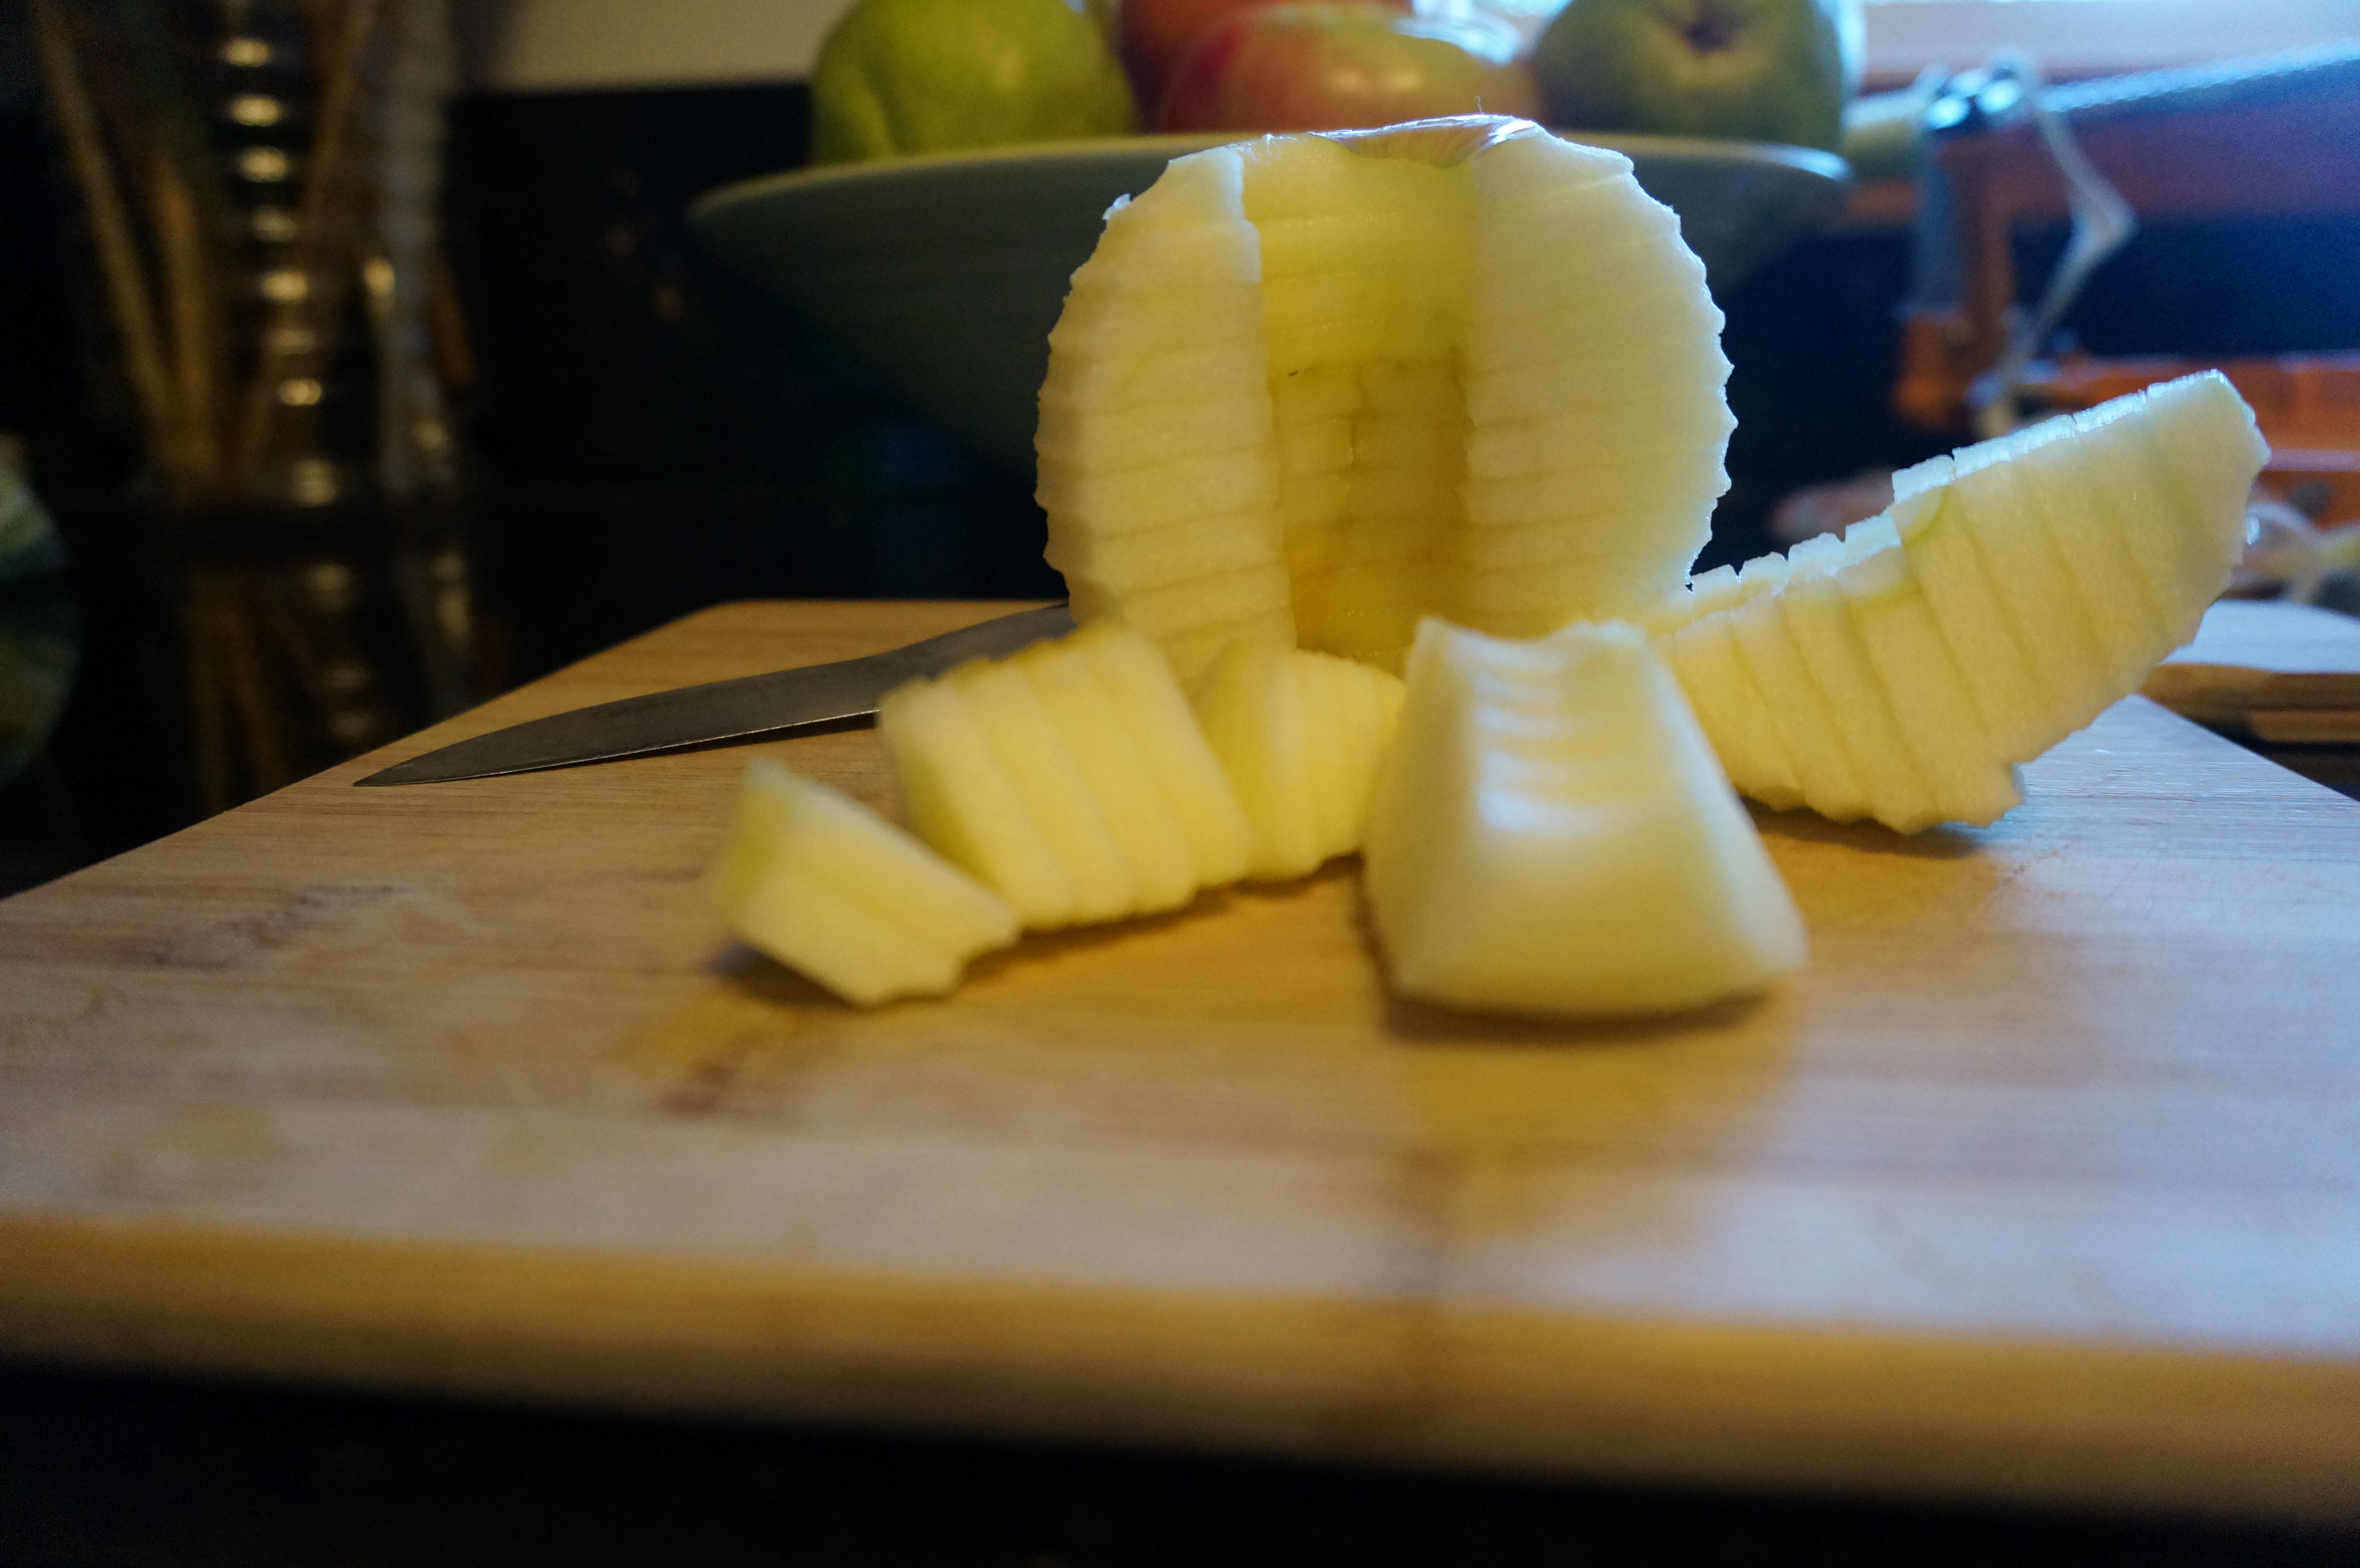
Peel, core, and chop an apple. Aim for thin chunks abut ½ inch square. Too thick, and they won’t cook through.
The next part works best in the blender. You could use a whisk in a bowl instead of the blender, but you already dirtied it making the oat flour, so why not use it one more time before you wash it? It’s always a good idea to beat your eggs when adding them to pancakes – especially oat pancakes, which can be a little on the dense side – because the extra air helps add fluffiness. The blender makes the whipping fast and easy.
 So. Dump all this into the blender: Two eggs, 1 cup of almond or coconut milk (I suppose you could use soy, but I find the flavor off-putting), 2 tablespoons of vegetable oil, 2 tablespoons of sugar, 1 teaspoon of vanilla, and 2 tablespoons of white vinegar. Why the vinegar? We’re imitating the effect of buttermilk. Buttermilk (and vinegar) is acidic and will react with baking soda, which is a base. The reaction creates bubbles of carbon dioxide. Translation: fluffy, crisp pancakes. Give it a whirl in the blender till it’s frothy and smooth.
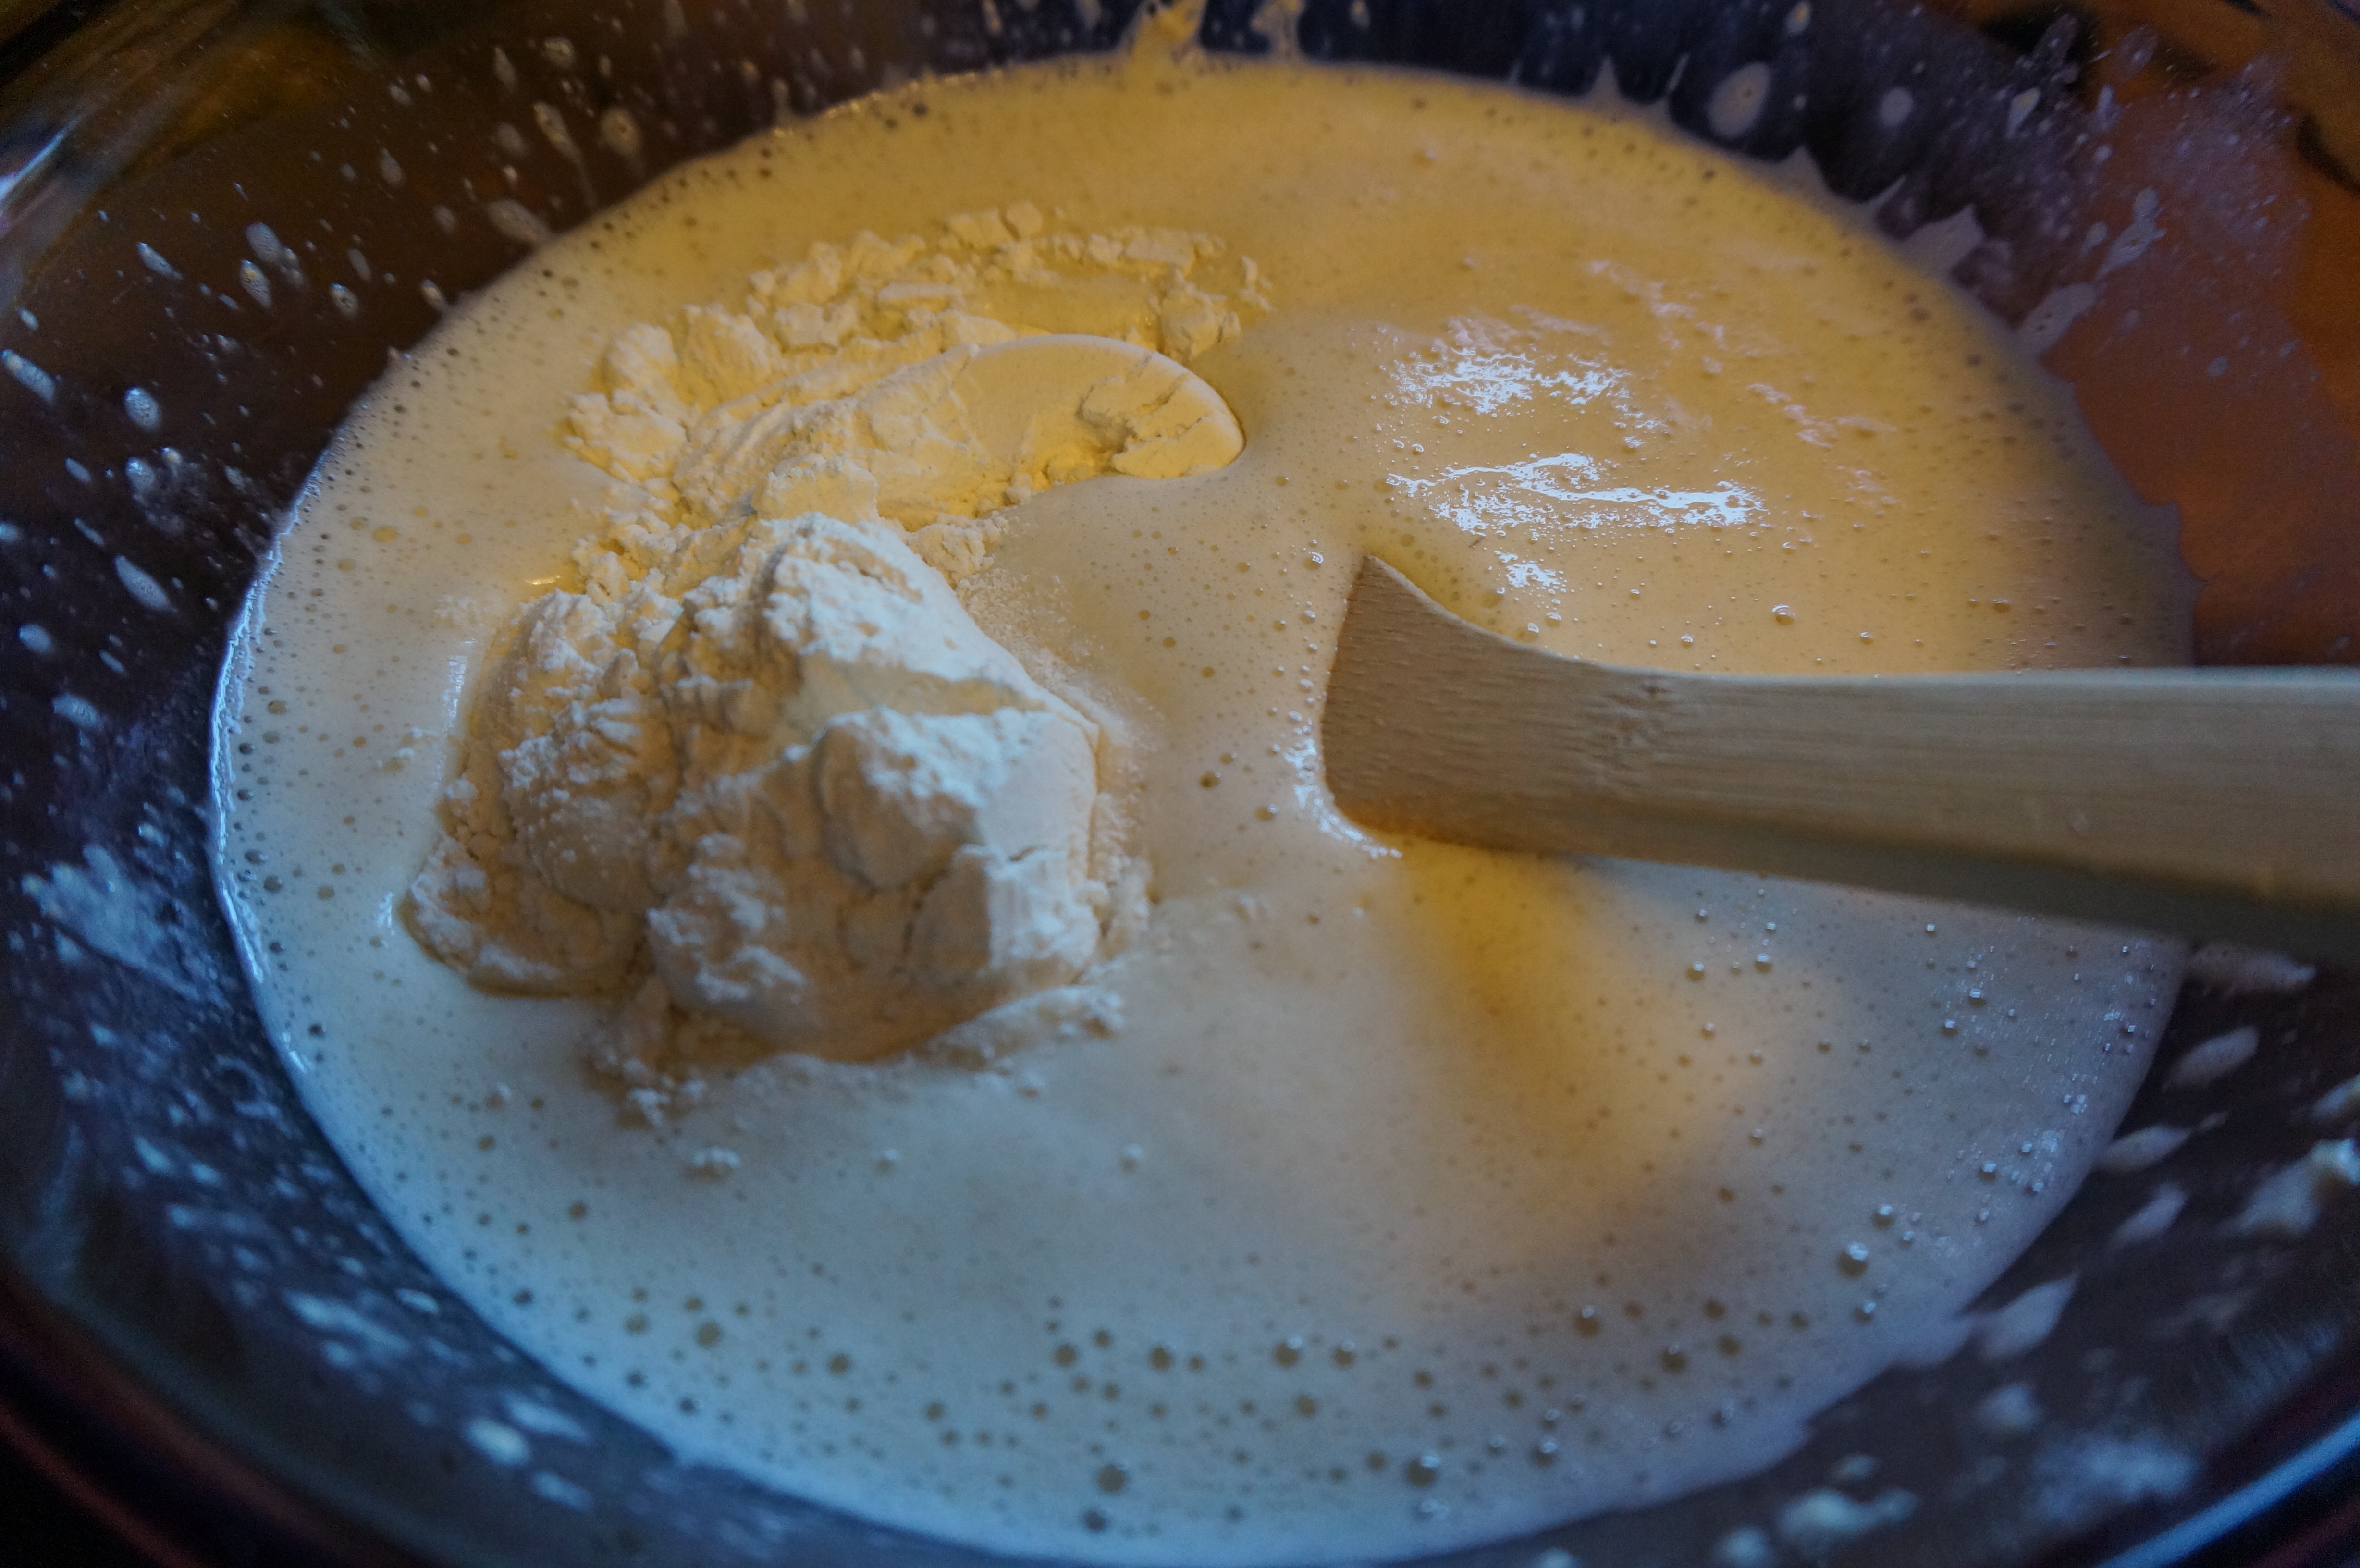
Pour the egg mixture into the flour mixture and stir it gently together. Add the chopped apples, stir gently again, and you’re

ready to cook them. Use a ¼ cup measure or a small ladle to pour the batter onto your preheated, oiled baking surface. Let the pancakes cook until you see that the edges are looking set, almost dry. When you flip them, the backs should be golden brown and crisp. (If they’re not, just let them finish cooking on the second side and then flip them back to finish on the first side. No biggie.)
These are best eaten drizzled with honey. There’s just something about the way the sweet honey complements the nutty oat flavor, and the sweet-but-tart apples bring the flavors together like a bright ribbon binding a bouquet.
Here is a more concise format of this recipe.


I’ve had a hankering for a tomato basil soup lately, and with all our tomatoes ripening like crazy, I decided to make enough to can. I’ve been picking and refrigerating them for three weekends, and now I think I have about a gallon – enough to use the recipe I found at pickyourown.org, a site I’ve found extremely useful over the past year. I can’t wait to taste it! I’ll admit to being a bit nervous, though. Tomatoes have to be pressure canned, and I haven’t used a pressure cooker for that purpose (I use it for water bathing jam and pickles) since I was in high school and closely supervised by my mother or an aunt. Sofie has been sleeping more dependably the last few nights, so I’ll do the canning part after the kids are in bed. Pressure canning takes a bit of focus, something I’m a bit short on at the best of times, and for safety I’d rather not have small people underfoot. This should be exciting!


Our green Concord grapes are ripe! Until we moved here, I didn’t even know Concord grapes could be green. But here they are. Deliciously sweet, with that distinctive Concord flavor. They’re slightly translucent and exquisitely juicy. When we step out our back door onto our stone patio, the sweet scent wafts from the arbor like a soft breeze from Heaven. Plans: grape jelly and wine. Stay tuned!
 This evening I had a small helper while I picked tomatoes. The plant you see sprouted on its own around June in a vacant section of a wheel-shaped garden, and since it wasn’t competing with anything I had planted, I let it grow. It has large orange cherry tomatoes with an extra-vivid flavor. What a delicious accident.
What you can’t see is the main tomato bed, in another wedge of the wheel-shaped garden. Every time I go out to pick tomatoes, I am reminded that sometimes a good piece of advice is worth doing a little extra work. This spring, as I was excitedly transplanting my very first baby tomatoes, my mother-in-law – visiting from Alaska – suggested tactfully that I might consider spacing them farther apart. “Sometimes tomatoes can really take off. They can outgrow their space quickly. These look a little tight to me.” I had already dug their holes and put the seedlings in. They looked so delicate and innocent, I simply couldn’t imagine them burgeoning into rebellious space hogs. And I was deep into transplanting strawberries. I didn’t want to replant the tomatoes. So I chose to believe they would remain staid and obedient.
They didn’t, of course. Now, each time I harvest tomatoes, as I tunnel headfirst into the vigorous vines and fight for a handful of bright red fruit deep in the thicket, I remember: “Sometimes tomatoes can really take off.”
Maybe next time I’ll listen.

Last spring, a year after moving to Oregon, we purchased our “forever home”: a 1979-built house on two acres of lovingly tended land. We were enormously excited to discover that we now own two apple trees. Neither of us had ever lived in apple country before. I had lived in northern British Columbia and Ontario before moving to Alaska, and Aaron had lived first in desert states and then in Alaska. Fresh apples from our own trees! Heaven!

The day Aaron picked the apples, he harvested 300 pounds of usable apples, plus another 100 or so that had been damaged by worms. You can imagine we were anxious to find ways to use them all. Aaron used a lot of them to press for cider – that’s another story. I made what seemed like vast amounts of applesauce, apple leather, and dried apples. That is, the amounts seemed vast while I was toting around a 9-month-old, making frequent nursing breaks, and fielding endless questions from a curious 4-year-old. After the supply of apples was exhausted, of course, what I had made seemed far less than adequate. There’s always next year to make even more, right? (Yes, we’ll be getting much, much, much more this year.)
Learning to make dried apples was an exercise in patience, as I tried several approaches over three or four weeks. I feel that I’ve perfected the method now. I can’t get enough of those things – I could eat them all year and not get tired of them. (Hint: skim aaalllll the way to the bottom for a short-and-sweet recipe that will fill 4 dehydrator trays with apple slices.)
Step 1: Prep the apples.
When I started making dried apples, I left the skins on, used a cylinder-shaped coring tool to punch out the cores, and used a mandolin to slice the apples. The mandolin, being cheap and weak, didn’t work all that well — the slices weren’t all the same thickness, they were weirdly corrugated, and it cut aggravatingly on a slant — but it was much faster than slicing by hand. The corer was faulty too: it was difficult to aim correctly, and it was smaller than the actual apple cores, so I kept getting leftover core in the apple, and removing good apple flesh with the corer.
Then one wonderful day, I visited Wilco, a local farm store, and came across an amazing device: an apple peeler-corer-slicer made by Weston, a maker of sturdy and useful farm-kitchen products. I adore this tool – not, however, as much as Niko and Sofia do. Sofia can actually turn the handle herself given a crisp enough apple, and ohhhh the thrill!

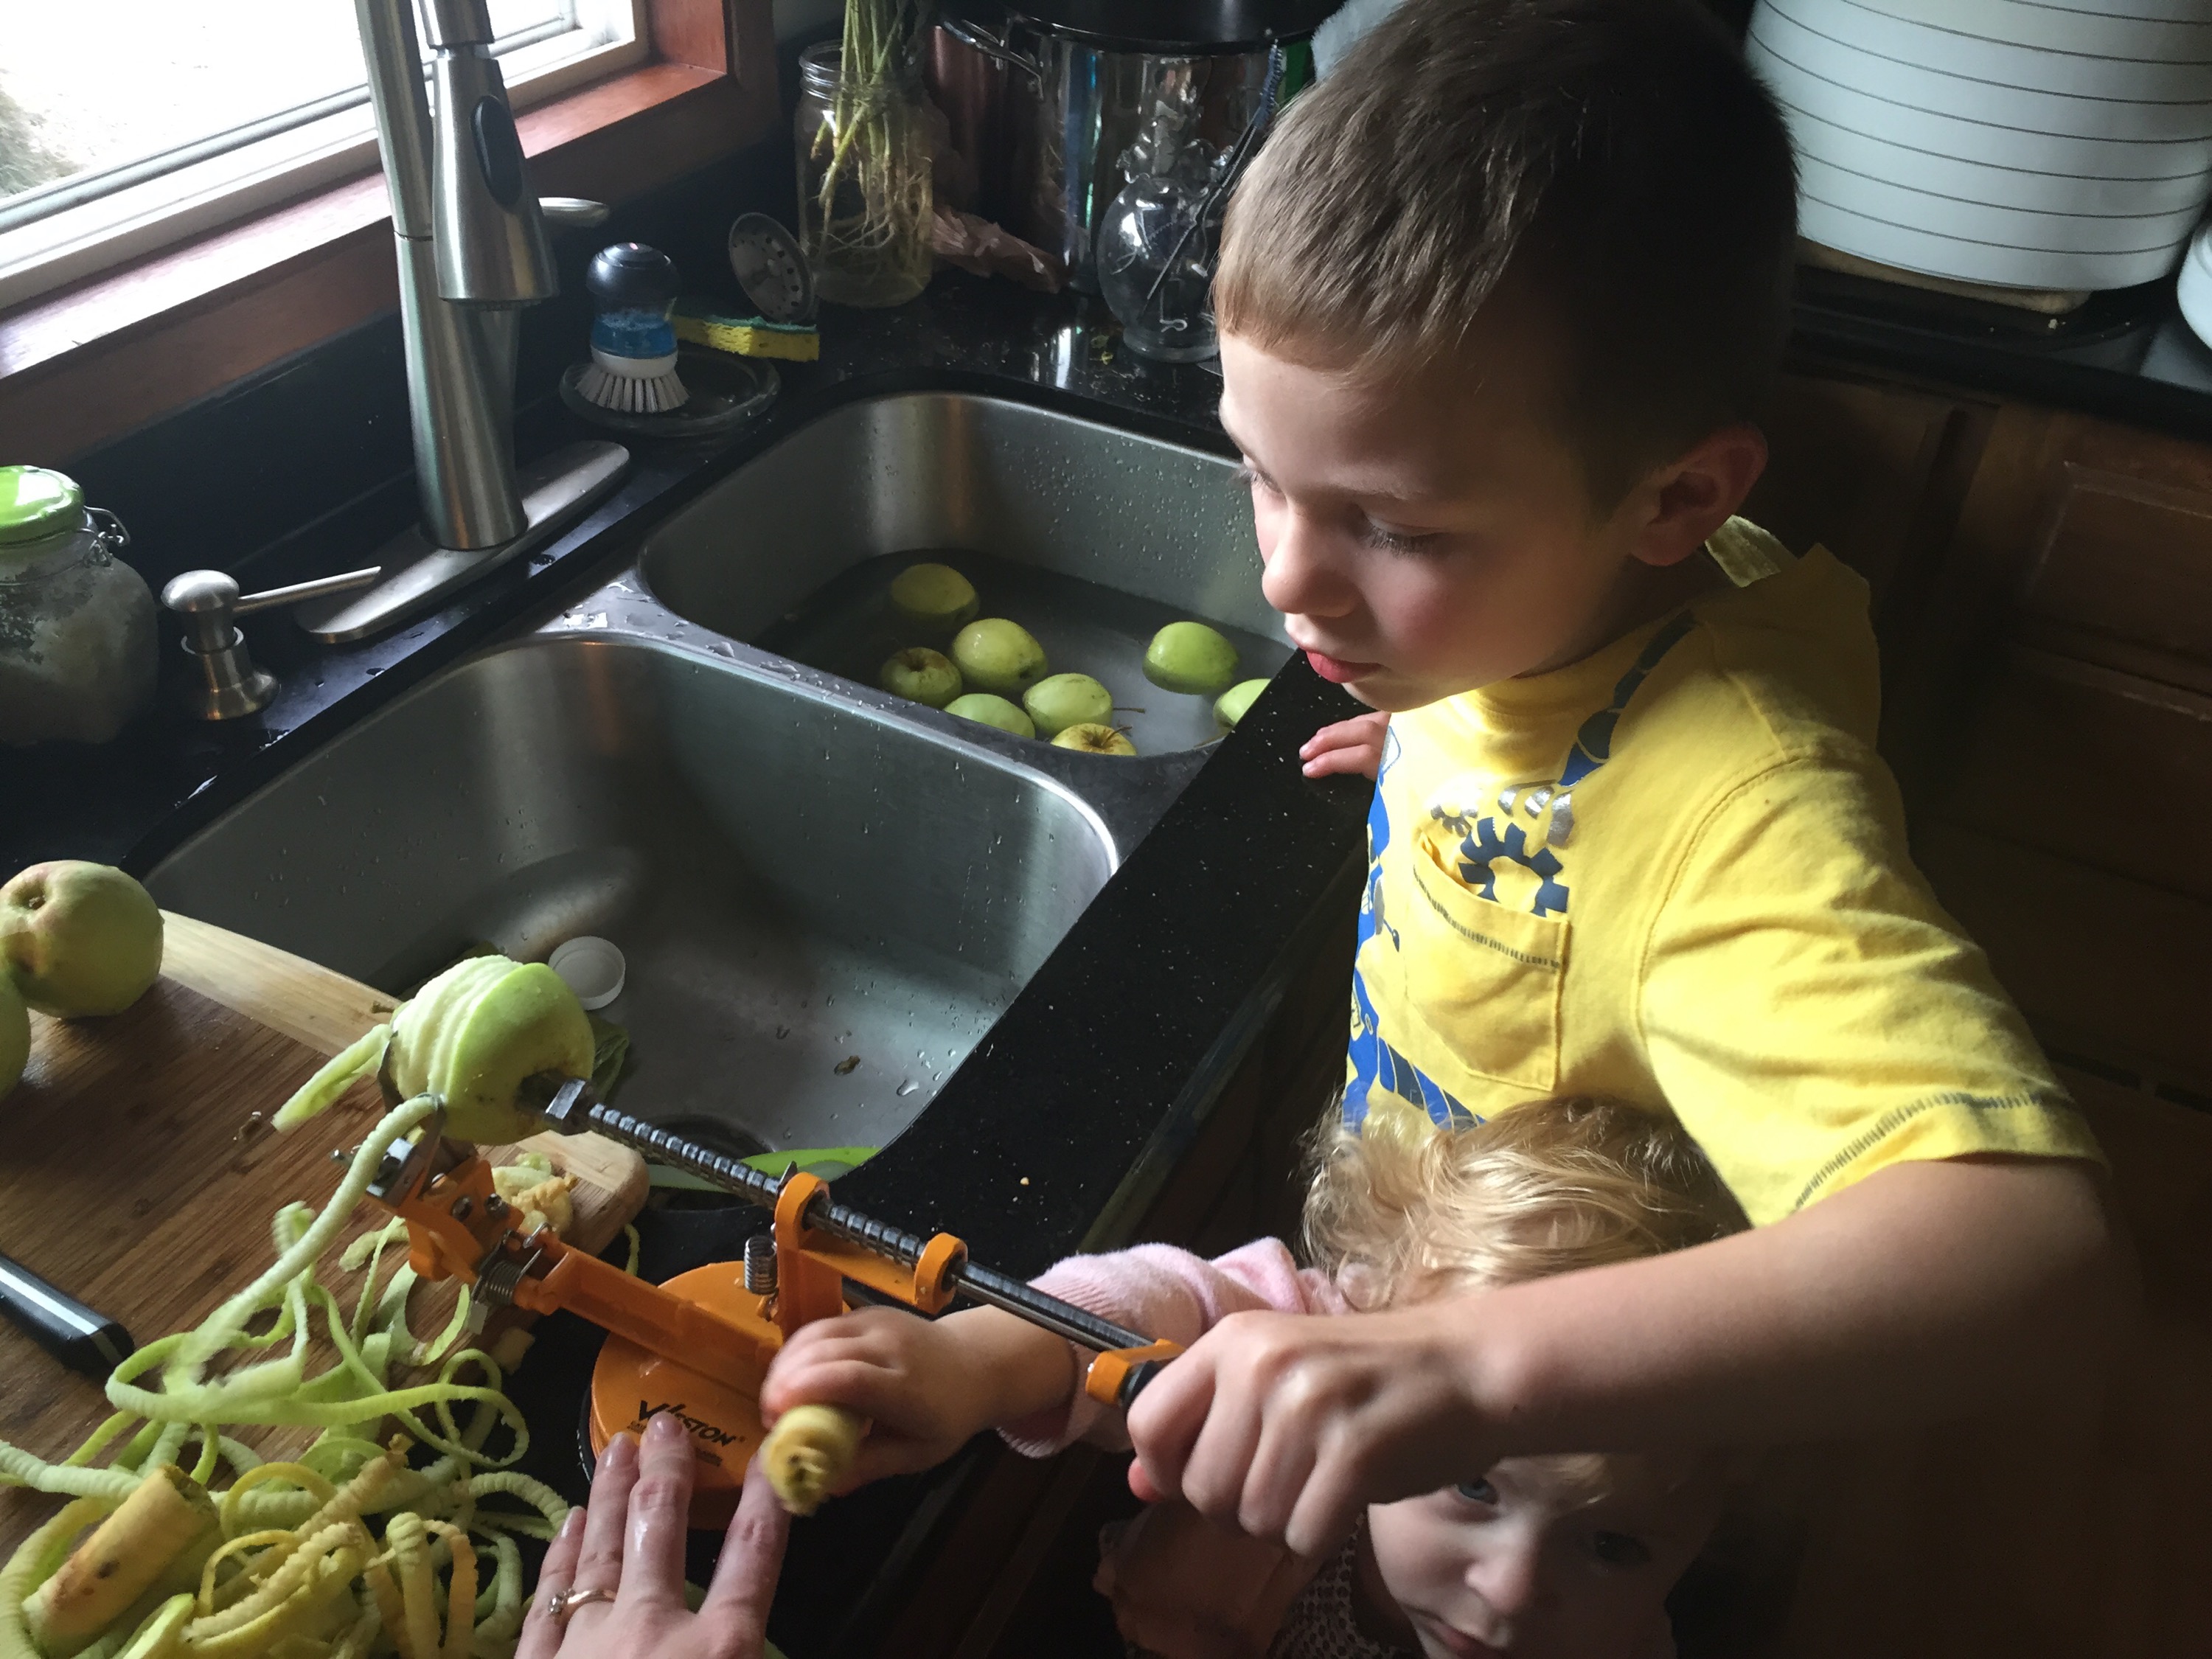
 You can see details on the slicer here. Using this delightful tool, I now know that dried apples have a better texture without the peels. It’s not enough of a difference that I’d hand-peel dozens of apples if I didn’t have it, though, especially since everyone knows (says my mother) that all the good vitamins are in the skin. Right?
Anyway, the point is, for dried apples, you want fairly thin slices, around 1/8 inch thickness. Slice in rounds from end to end after coring. They need to be the same thickness so they dry at the same rate, so unless you have a very steady hand, slicing them by hand isn’t that great. Good tools: a mandolin (a high-quality one), a Kitchen Aid-type slicer attachment, a manual countertop slicer. If you use a peeler-corer-slicer like mine, the apples will be cut in a giant spiral, so you can just make a slice right down one side of the spiral to get a stack of neat circles. Start with about 6 apples to fill 4 trays on a dehydrator.
Step 2: Blanch the slices.
Don’t skip this step. When I started, I thought I would make lovely unsweetened dried apples that were as close to their original state as possible, thus preserving all the natural goodness and removing unnecessary sugar from my children’s diet. They were…okay. Mediocre. Nothing to write home about. Actually, they were tough and much more tart than the original apples. I came to the realization that blanching is really helpful. Also, dipping them into sugar water doesn’t increase the amount of sugar in this snack a substantial amount. They’re still barely sweetened, very healthy, vitamin-rich, high-fiber food items!
Over the final weeks of last summer, I tried various blanching methods until I finally got it just right.
Fill a medium stock pot with 8-10 cups of water, leaving room to add apple slices. Add 1½ cups of brown sugar, ½ cup of honey, ¼ cup of cinnamon (the bulk section at the grocery store is your friend here – or Costco), and a hearty sprinkle of nutmeg – let’s say 1 teaspoon if you like it as much as I do. That is a lot of nutmeg; I am a big fan of nutmeg, and you can distinctly taste it in the dried apples, so cut it back if it’s not your favorite flavor. Heat the mixture just to boiling, then turn the heat down low. On my JennAir range, circa 1985, this keeps the water barely moving. I wouldn’t even call it a simmer. But the point isn’t to cook the apples – just give them some flavor, and soften them a bit so they’re not tough once dried. And the sugar actually seems to improve the texture, too. Leave them in the blanching liquid for 1-5 minutes at a simmer till barely soft, 5-10 minutes if the water is merely very hot (a good idea if a toddler is helping you), then scoop out. You won’t hurt them if you’re distracted by a squalling toddler and leave them in there for ten minutes or so, as long as it’s really not boiling, but they don’t need that kind of time. The reason I’m giving such a wide range of time for blanching? When I was making these, I was slicing a pile of apples, tossing them in, slicing, tossing…till the pot seemed full, then stirring for a minute and scooping them all out, and I found they all turned out about the same. This is the least scientific cooking I’ve ever done, but amazingly enough, they’re just fine! I use a wide mesh ladle for scooping, which also works well for distributing them around the rack.
 This is a good place to add a piece of advice: If you plan to make more dried apples, don’t dump out your blanching liquid when you’re done. Cover it and refrigerate it until you’re ready for the next batch. You should have plenty to do at least one more. No need to waste all that lovely cinnamon!
Step 3: Arrange on the drying racks.
Spread the slices on dehydrator racks, or on cooling racks on cookie trays. The important part here is to leave room for air circulation, while maximizing space. Translation: Don’t let the pieces touch.
 I have learned to put a fruit leather tray under the bottom rack in the dehydrator to catch drips. It makes the bottom rack a little unsteady, so be cautious if you’re moving the dehydrator after filling the racks. The tray makes cleanup much, much easier, since it — unlike the dehydrator base — can be immersed in water.
Step 4: Dry.
How long you let them dry depends on how you like your apples. I like mine two ways: just barely dried, so they’re velvety-soft, and crispy. For velvet-textured apples, turn the dehydrator’s temperature setting on 135-140 and dry for 4 hours. Check them periodically. The apples at the bottom of the stack of trays, and the smaller circles, dry faster, so some might be done after only three hours while others may need five. For crispy ones, set it for 140 at 6 pm, intending to turn off the dehydrator at bedtime, and then go into the garage at 9 the following morning to do laundry and discover it still running. That worked just perfectly for me.
If you don’t have a dehydrator, place the baking sheets that you filled in step 3 into an oven set to “Warm” (unless the temperature setting on your oven goes all the way down to 135 – mine doesn’t) for about four hours, checking periodically to see how the texture is. It might be useful to first use an oven thermometer to see how hot “Warm” actually is, since you would need to adjust your time if it’s over 140.
Step 5: Devour.
Eat them by the handful. Put them into school lunches. Cut them up into granola or cook them in hot oatmeal. Mix them with pretzels, cranberries, and nuts for a fall time snack. However you eat them, expect them to go fast. You’ll be lucky if they last a day. They’re that good!
Here’s a less chatty format for those who want to read a recipe the traditional way:

This post has been updated with current photos, corresponding dates so readers who know me aren’t confused, and slightly improved information. Enjoy!
