I'm a temporarily staying-at-home mom of two living in Oregon, learning all over again (after 15 years of city life) how to garden, harvest, and put up food. You might see posts about baking, parenting, crafting, organization – anything that strikes my fancy!
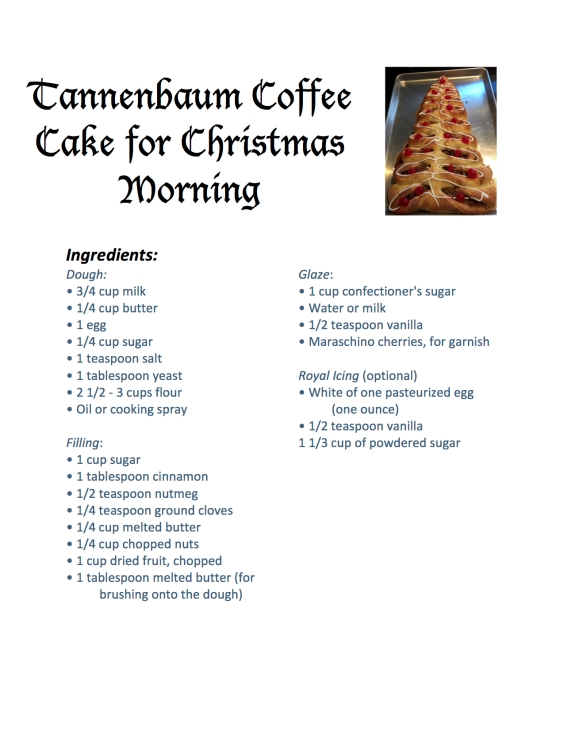
At some point in my late teens, I came across a recipe for Christmas tree-shaped coffee cake. My family didn’t celebrate Christmas, but I fell in love with the recipe and made it anyway. It turned out to be a hit, and I’ve made it nearly every year since.
I can’t remember now where I found the original version of this recipe. It’s scrawled in my embarrassingly cute recipe journal, which is pink and enlivened with a photo of kittens on the cover, and I recorded it before I began my habit of referencing the sources of my recipes.
I’ve altered it somewhat from the original over the years. I use the original recipe for the dough, but since the recipe made two huge tree-shaped coffee cakes, I now cut it in half to be more reasonable for a small family rather than a large gathering — in fact, this year I’ll use this half-sized recipe to make two small ones instead of a single large cake, and freeze one for New Year’s morning. Besides adjusting the amount of dough, I tweaked the original filling, adding spices and dried fruit and increasing the overall amount. So, while I do wish I could give credit to the original creator, the evolution over the years is enough to erase any compunction I might feel for failing to cite my sources.
This sweet treat is more like an elaborate, decorative cinnamon roll than the coffee cake I grew up with, which was a cross between a quick bread (like banana bread) and a cake, with a cinnamon streusel topping. Instead of baking soda, this coffee cake uses yeast, and it needs to be made the afternoon before you’re planning your breakfast to give it plenty of time to rise overnight.
You may scroll all the way to the bottom to read a more concise version of this recipe, and print a PDF.
Start by collecting your ingredients:
Dough:
3/4 cup milk
1/4 cup butter
1 egg
1/4 cup sugar
1 teaspoon salt
1 tablespoon yeast
2 1/2 – 3 cups flour
Oil or cooking spray
Filling:
1 cup sugar
1 tablespoon cinnamon
1/2 teaspoon nutmeg
1/4 teaspoon ground cloves
1/4 cup melted butter
1/4 cup chopped nuts
1 cup dried fruit, chopped
1 tablespoon melted butter (for brushing onto the dough)
Glaze:
1 cup confectioner’s sugar
Water or milk
1/2 teaspoon vanilla
Maraschino cherries, for garnish
Royal Icing (optional)
White of one pasteurized egg (one ounce)
1/2 teaspoon vanilla
1 1/3 cup of powdered sugar
You’ll mix and knead the dough and shape the coffee cake the night before you want to eat it, so be sure to plan enough time — and enough refrigerator space to let it rise overnight!
Start by getting the dough ready. Heat the milk and butter together in the microwave. In my microwave, about a minute and a half is enough to warm the milk without scalding it. The butter won’t be completely melted — let the mixture sit on the counter a few minutes, and the butter will finish melting while the milk cools slightly. You don’t want the milk to be hot, just warm. Hot milk will curdle the egg and kill the yeast.
While the milk cools, mix your dry ingredients in a medium bowl: 2 cups of flour, sugar, salt, and yeast. You’ll add the rest of the flour later.
Lightly beat your egg, and stir it into your milk and butter mixture, after testing to make sure the milk is just warm. It should be just a bit warmer than body temperature — a shade warmer than a baby’s bottle. If you drip a bit onto your wrist, you’ll feel warmth without getting burnt.
Stir the milk mixture into the dry mixture to make a sticky dough — you may need to use your hands to get all the flour incorporated into the dough.
This is a good time to point out that you can do this whole process using a stand mixture, if you want, from mixing the dry ingredients to kneading the dough. I would use the paddle attachment at first, and then change to the hook for kneading. However, I prefer to knead by hand, partly because I’m a traditionalist and partly because I think you get a better feel for the texture of the dough when you use your hands. My husband likes to use the mixer, because you can use the highest setting and get the kneading over with quickly.
Once the dry ingredients and milk are mixed, sprinkle about a quarter of a cup of flour onto a clean counter and turn the dough out onto the flour. Sprinkle another quarter cup on top, and knead the dough. To knead, use both hands to press down on the dough, fold it toward you, and give it a quarter turn before repeating the process. Continue kneading for about ten minutes (or as little as five minutes if you’re a very vigorous kneader). Add more flour as needed, sparingly — too much will make the dough feel dry when it’s baked. When the texture of the dough becomes firm and springy, it’s been kneaded enough. It’s not the addition of flour that causes the texture change so much as the kneading. Working the dough causes the wheat gluten to form, which is responsible for giving it the elastic feeling of a yeast bread.
The kneaded dough, firm and springy.
The dough before kneading.
The dough after rising, now punched down.
When the dough has been kneaded to an elastic consistency so that it springs back when you press it, form it gently into a ball. Lightly oil a bowl (I just use the one I mixed the dough in), drop the ball of dough in, and then turn it over once so that it’s covered with oil. Place a cloth over the bowl and set it aside to rise for about an hour, until it’s doubled in size. The warmer the place you leave it, the faster it will rise — just don’t put it in a hot place, or the dough will start to bake and the yeast will die off.
While the dough is rising, make your filling. Start by chopping your dried fruit. What fruit you use is really your choice. Last year I used golden raisins, cranberries, pineapple, apricots, and papaya, along with pecans. This year I’m using dried cherries, cranberries, mangoes, dark raisins, and hazelnuts. The dried fruit, combined, should come to about a cup, and the chopped nuts should be about 1/4 to 1/2 cup.
Chopped fruit and nuts.
Mix the melted butter with the spiced sugar.
The filling, all mixed together.
Combine the sugar and spices. Add the melted butter and combine completely, then stir in the chopped fruit and nuts.
When the dough has risen until it’s doubled in size, the coffee cake is ready to shape. Give the dough a good punch to make it collapse. Then turn it out onto a lightly floured counter. Lightly flour a rolling pin, and roll the dough out into an isosceles triangle with a 12-inch base and 15-inch sides. I use the length of the rolling pin as a guide for the length of each side.
The dough after rising, now punched down.
Use the rolling pin’s length as a guide for the triangle’s size.
Once you have a good triangle shape, brush the dough with about a tablespoon of melted butter. Cover the dough evenly with the filling, leaving space along the edges.
Sprinkle the filling evenly.
Bring the sides together, pinching to close.
Cut into the sides.
Twist the slices downward.
Bring the sides together, pinching the filling-free edges firmly together to make a tight seam. Seal the bottom as well so filling doesn’t fall out when you transfer it to the pan. The best way I’ve come up with to get it from the counter onto the pan is to slide a rigid plastic sheet dusted with flour underneath the filled triangle (I use the plastic placemats my kids use for play dough), and then support it with a hand underneath and a hand on top as I quickly turn it over, seam downward, onto the oiled baking sheet.
Now, lightly score a guide line down the center of the triangle, from peak to base. Use sturdy kitchen scissors to cut slices into each side, ending about a quarter inch from the line. I made eight cuts in the one above. You could do more for smaller slices, but fewer cuts would make the slices too wide to easily do the next step.
Starting at the bottom, give each slice a firm downward twist, toward you (assuming you’re at the base of the triangle). Twist each one so that the filling is visible, and the ends are tilted forward slightly. Cover the tree lightly with plastic wrap, and place it into the fridge to rest and rise overnight.
In the morning, turn on the oven to 350, pull the coffee cake out of the fridge, and let it come to room temperature on the counter while the oven heats. If you have enough time, give the coffee cake a good half hour to rest before putting it into the oven. (It’s not going to make a big difference, but it will be slightly lighter in texture if it has time to warm to room temperature before baking.) Bake it at 350 for 20-30 minutes, till the bread is golden-brown and the filling is sizzling.
Allow the coffee cake to cool slightly while you mix the glaze or icing. To make a basic glaze, sift the powdered sugar into a measuring cup with a pour spout, then drizzle milk or water in, whisking, until it’s a thick, smooth, pouring consistency. Add vanilla. (Another option, especially if you used cranberries in the filling, is to use orange flavoring and add some orange zest.) Drizzle the glaze over the coffee cake in a decorative pattern. This type of glaze won’t show up much — it will soak into the warm coffee cake a little. Add colorful maraschino cherries, cut into halves, or bright-colored candied fruit, to give the effect of ornaments on a tree. I’ve always used both red and green cherries until last year — I’ve been unable to find green ones for the last two years. Maybe you’ll have better luck.
If you want your coffee cake to have a bright white icing like mine, use a royal icing instead of (or on top of) the glaze. I had some left over from decorating gingerbread cookies, so I used that for the coffee cake, with a very pretty effect. The recipe I’m giving here is Alton Brown’s recipe for royal icing, reduced to a third. A quick note: I was able to do the full sized recipe in my stand mixer with the whisk attachment, but the egg whites barely met the whisk at first, until I tilted the bowl upward. Once the whites got fluffy, it was fine. The single egg white won’t fill the mixer bowl enough for the whisk to do the job. To do this smaller recipe, use a hand mixer and a bowl.
To make royal icing, use one ounce of pasteurized egg white (the equivalent of one egg white). Beat it with a hand mixer, together with the vanilla, until it’s fluffy and white. Gradually add one and a third cups of icing sugar, beating at low speed. Once all the sugar is mixed in, continue beating at high speed until the icing is glossy and stiff. Use a plastic bag with a tiny corner snipped off, or an icing bag with a piping nozzle, or even a spoon, to drizzle over the coffee cake in a pretty design. Then add the candied cherries. The icing will harden fairly quickly and will retain its bright white look.
Applesauce! It is the very easiest, fastest, and one of the most delicious ways to preserve apples. It’s great whether you have a couple of trees’ worth of apples that you need to take care of in a hurry, or you want to take advantage of your local grocery store’s super sale on fruit, or you just have a sudden hankering for some smoothly stewed, lightly spiced fruit. One reason I love making applesauce is that there’s so little waste: I stew the apples without peeling or coring, and sieve the coarse pieces out in the final steps, so all the delicious apple flesh is saved — unlike in other methods, when some flesh necessarily is thrown out with the peel and core. You can make a big batch, as I do, to make canned applesauce (I end up with about six pints), or reduce the size and make just a small batch to keep in the fridge. Either way, the basic process is the same except for the actual canning.
Aaron is an apple-picking machine.
Monkey kids “helping” Dad pick apples.
A big apple harvest this year.
Fresh apples.
Apple season is about over at our home. We’ve had apples coming out our ears this fall (speaking figuratively, of course), and I’ve used a lot of them in dried apples, jam, fruit leather of various types (all including apples), and an earlier batch of applesauce. A week ago, Aaron informed me he was commandeering the remainder of our apple harvest for pressing juice to brew a “hoppy” cider, so I preempted the coming reduction in produce by gathering a collection of attractive ones to make one more batch of dried apples and a batch of my own recipe of Harvest Apple jam, and filled a big pot with apples for a cooking up a final batch of applesauce. Today I’m finally finishing that one last batch of applesauce (the stewed apples have been sitting in the fridge while I’ve been battling a week of migraines), and now I’m sharing with you this easy, scrumptious fall-time favorite. Mmmm, mmmm, good! Oh, and in case you wondered, I left plenty for Aaron. He got four gallons of juice for his cider.
Grinding the apples into little chunks for pressing.
Aaron’s cider press.
A carboy full of brew working away.
Before I launch into the applesauce recipe, two disclaimers, if you will. First: despite my background, growing up in a subsistence lifestyle — living alternately on a religious commune, a trapline, and back on the commune — and spending that time baking and cooking and preserving for all I was worth, I am not an expert on canning and preserving. I was a kid during that time, following other people’s instructions. My memories are a bit foggy, and I don’t have recipes from back then. My knowledge comes from picking my mom’s highly experienced and knowledgeable brain, begging my gardening and cooking friends on Facebook for advice, reading cookbooks like The Ball Complete Book of Home Preserving, scouring the Internet for ideas, and obsessively reading the FDA and USDA’s online pages and various university-hosted pages on home preserving safety, methods, and recipes. I’m sharing my newfound knowledge with you because I’m having so much fun learning about canning and making food, and I’m the kind of person who can’t not share what I know. Once a teacher, always a teacher — and combined with a predilection for writing, this is what you get. This blog is a record of my journey in gardening and home preserving, not a declaration of my expertise.
Second: Despite not being an expert, I have done my research. Recipes like this depend on a certain acidity level to be safe for canning. If you wish to modify my recipe, please please please do your own research before changing it in some way such as adding large amounts of water or mixing in other fruit. Apples are safe for canning on their own, without adding lemon juice for acidity, but if you want to change things up, make sure you check out some of the links I provided above before you do anything drastic.
And now some general words on canning. Those of you who have read others recipes of mine, you know how I operate: I explain stuff a lot. I’m an overexplainer. If you want to skip all that, just scroll. Keep scrolling. A little more… There you go. You’ll find the actual applesauce recipe and processing instructions near the bottom. You’re welcome. (But don’t blame me if you miss something essential as you skim downward.)
Before you begin, make sure you have all your tools and materials ready. For this type of canning — called water bath, boiling-water, or hot pack canning — you don’t need a real pressure canner. You just need a pot big enough to hold all your jars, with a rack on the bottom to elevate them so they don’t contact the pot, and deep enough that the water can cover the jars by a full inch with plenty of room to boil. I do use a pressure canner, because it’s hard to find another pot that’s big enough to fit the above criteria, and because it makes me feel like I’m doing something exciting, but I have so far never used it for pressure canning — I just use it as a giant pot for boiling water. I’ll be honest: the idea of actual pressure canning scares me. It would scare you, too, if you’d ever walked into a kitchen covered ceiling to floor in exploded jar and green bean fragments.
You need a few tools besides the large pot or canner, too. You can get most of these together in a set at a farm store like Wilco, at your local grocery store during canning season, or in an online search at many shopping sites. Besides your jars, the most essential tool is a set of canning tongs. These tongs have a curved, rubberized gripper that’s just right for grabbing hot jars and moving them in and out of boiling water, and the positioning of the handle is such that you can pour water out of them after sanitizing without scalding yourself. As I said, essential. Nearly as essential is a wide-bottomed funnel, which will help you fill jars without drips.
A less important, but still handy, tool is a magnetic lid lifter (useful for lifting flat lids out of hot water when you’ve sanitized them), or — my preference — a lid rack with a long handle, which you can lower into the recently-boiled water in your canner after sanitizing your jars, while you fill them. You also need something with which to release air pockets when you’re making foods like pickles, though it’s slightly less necessary with something like applesauce. A canning set comes with a flat plastic tool for this purpose, with one end notched for measuring the space at the top of the jar in case you’re obsessed with perfection. A butter knife works perfectly well if you don’t feel like purchasing a whole set of canning tools.
Jars, of course, are truly essential. For our family, pint jars (either widemouth or narrow-mouth) are just right for applesauce — I’ve found that if I use quarts, we use about half a jar immediately once one is opened, and then it sits in the fridge and molders. We end up wasting a lot that way. So I sacrifice a bit of shelf space and use the smaller pint jars. In terms of canning safety, it really doesn’t matter whether you use pints or quarts.
To can safely without risk of bacteria growing in your food, you need to start with sanitized jars. A lot of people recommend sanitizing your jars in the dishwasher, but I don’t like this approach, and here’s why: 1) If your dishwasher is running to sanitize your jars, you can’t use it to hold your dirty dishes while you prep your food. 2) You need to heat your canner full of water anyway so that you can water bath your jars full of food, and you might as well take that energy to sanitize the jars at the same time. 3) Your dishwasher doesn’t get as hot as a boiling pot of water. If your jars aren’t thoroughly sanitized, you need to process the food-filled jars longer — and the less you process the food, the better the flavor and the quality.
That’s why I start my canning sessions by placing my clean, lidless, pint jars into the canner –as many as the recipe suggests (in this case, six) plus another one just in case — and filling the jars and canner with water to at least an inch above the top of the jars, making sure there’s room for the water to boil. Then I put the lid on, place the canner on the largest burner, and turn the heat on high. It takes quite awhile, on my elderly cooktop anyway, for the canner to heat — sometimes I’m nearly done prepping the food before it’s done heating. When it does boil, I turn the heat down a bit and make sure it boils for at least ten minutes before I turn the heat off.
I leave the jars in the canner to stay hot, away from dust, and out of drafts until I’m ready to fill them. They need to stay hot because you’ll be filling them with hot food; you don’t want to pour hot food into cool jars, because there’s a chance they could break or become stressed (and break later). Ditto with hot jars sitting in a draft. You want them away from dust because dust can disrupt a good seal. So just leave them in the canner, where they’ll be safe, and you’ll have more counter space for working as well. Win-win.
Unlike the jars, you don’t want to boil the lids — boiling can degrade the rubber seal. If you have a nice lid rack like mine, you can lower the lids into the canner after you take the jars out, or once the canner stops boiling if you have room in the canner. This will sanitize them as much as they need, and will soften the rubber to ensure a good seal. If you don’t have a long-handled rack, put the lids into a shallow dish, pour some of the hot water from the canner over them so they’re all covered, and let them sit while you fill the jars. This is where that magnetic lid lifter comes in handy, so you can lift them out without burning your fingers. Otherwise, of course, you can pour the hot water off right before you’re ready to put them onto the jars.
Lower the lid rack into the hot water.
The lid rack is a convenient tool.
On the topic of jar lids: I’m a very thrifty person. I reuse whatever I can. The one thing I don’t reuse is flat jar lids for canning. Why? Because I know that the heating process the lids undergo when the food-filled jars have been boiled for canning will begin to degrade the rubber seal. It may not be visible immediately, but it’s happening. Reused jar lids may seem to seal just fine, but might slowly lose their seal over time as the jars sit on the shelf, allowing the food to spoil. If this happens, the best-case scenario is that you lose your hard-won preserved food; the worst-case scenario is that the spoilage doesn’t leave any noticeable signs, and your family gets sick with food poisoning. So, please don’t reuse your jar lids. Additionally, as you’re counting out your brand-new, unused jar lids, check the rubber seal for any damage. If there are scratches or bubbles in the seal, throw them away. And if you, like me, save your used lids for casual food storage, double-check that you don’t have any damaged lids that accidentally got mixed in with your brand-new boxed ones — if the lids are bent or warped in any way, throw them away.
A tiny dent in the edge of the lid: bad. Throw it away.
A bubble in the seal: bad. Throw it away.
The rubber seal is intact, but there’s a big dent across the lid. Throw it out!
You need one more tool for making applesauce that’s not part of the general canning tool set. Exactly what this tool might be depends on your budget and the frequency with which you do this sort of thing. You need something for squashing apples. If you use my approach of not peeling or coring, you need something like a Foley food mill, a Kitchen Aid (or whatever brand you prefer) fruit and vegetable strainer attachment, or a chinois. If you don’t want to invest in a special tool, you could just use a potato masher or a blender — but you’d need to start by peeling and coring your apples first. Last year I used a food mill, and it was much better than my previous approach of pressing the apples through a sieve with a wooden spoon — but it was still fairly labor intensive. This year we splurged on a set of Kitchen Aid attachments, and using the fruit and vegetable strainer attachment has been heaven: so easy.
One way to process the stewed apples: a Foley mill.
A chinois food strainer
The inner workings of the fruit/vegetable strainer
Now that you’ve patiently endured all my thoughts on canning, you’re ready to make applesauce! Start by collecting your fruit, about 8 pounds of apples. Eight pounds of whole apples fills up my tallest cooking pot to the brim, which is exactly how I determined how much I needed for a batch of applesauce. It does not matter what kind of apples you use. It really doesn’t. If you use super tart apples, you can add a bit more sugar to sweeten it to taste; if you use sweet ones, use less sugar. My personal approach, since I’m using apples from our own trees, is to choose the ugliest apples: misshapen, bruised, dented, tiny, whatever makes them undesirable for other uses. This approach might work if you’re buying from a U-Pick farm, too — you may be able to get a discount if you offer to take battered fruit off their hands. The point is, the appearance doesn’t matter for applesauce, and since you’re not peeling or coring, you may as well use up the ones that will be difficult or time-consuming to peel for other purposes. We have two trees, one that produces apples that might be Golden Delicious and one that produces pretty red apples with green streaks, much more tart than the yellow ones at their ripest. I don’t bother separating the two varieties for applesauce. I just choose the ugliest, and go from there.
Use the ugliest apples for applesauce.
I love the way the apples look freshly washed.
Begin by cleaning the apples thoroughly: give them a rinse, and then fill your sink with water and dump the apples in for a good soaking. Even an organic orchard uses some kind of pesticide; just because it’s approved for organic use doesn’t mean you ought to eat it. Besides, who knows what kind of bug poop and bird spit might be on there? So wash those apples, no matter where you got them.
If you don’t have a tool for straining the peels, cores, and seeds out, you’ll need to start by peeling and coring the apples, in which case I strongly recommend an inexpensive ($20) tool like this:
This year Sofia is big enough to turn the peeler’s handle!
Otherwise, just cut each apple into halves or quarters, even the tiniest ones, and drop them into your largest pot. Cutting them serves two purposes. First of all, it helps them cook down faster and gets the juice flowing and the flavors mixing. Yum. But — and more importantly — it lets you see the inside of the apple before you put it into the pot. If you’re using beautiful, shiny, grocery store apples, this is a less crucial factor. If, however, you’ve chosen the ugliest apples from your own trees — or even fairly attractive ones — slicing them open is beyond essential; it is absolutely imperative. Allow me to illustrate:
Small, firm, no visible blemishes…
This is why you slice open every single apple.
Misshapen but perfectly fine.
While you’re cutting, keep in mind that they don’t need to be pretty. Bruises are okay. If you see a wormhole, just cut it out. If half the apple is bad, cut off the bad half and toss the good half into the pot. It doesn’t matter; it’s all going to cook down into mush.
When your apples are all cut and in the pot, give your pot a good look. Is there room for boiling and stirring? If not, now is the time to grab another large pot and dump half the batch into the second pot. That original eight or so pounds of apples, now quartered and bad parts cut off, fills my tall pot about to the handles, which gives me all the room I need to stir. If it were fuller than that, I’d need to cook it in two batches.
Pour in two cups of water to keep your apples from sticking and get the juices flowing. If you’re doing two batches, a cup in each pot is just right. Next, add no more than 1/2 cup of sugar for tart apples, or use 1/4 cup of sugar if your apples are sweeter. You could even skip the sugar and wait till the end to decide how much to sweeten your applesauce. I like adding sugar at the beginning because it helps pull the juice out of the apples, which in turn creates more liquid in the pot, making the apples cook down faster. Add 1 tablespoon of cinnamon and 1 teaspoon of nutmeg. Other spices that might go well with applesauce, but that I don’t usually use, are allspice, cloves, and ginger. I generally just stick with cinnamon and a dash of nutmeg so that the fresh taste of apple is the starring flavor.
Sprinkle in some sugar.
Add cinnamon before cooking.
Stirring the cooking apples
Set your pot on the stove on high heat with a lid, give it a stir to mix in the sugar and spices, and let it heat until you hear boiling. Give it a good stir, bringing the soft apples up from the bottom and letting the firm ones on top drop down. Turn the heat down to medium and let it keep on cooking, covered. Stir it thoroughly every fifteen minutes or so. You’ll know the apples have cooked long enough when they are uniformly mushy, and none of them hold their shape when poked. With a giant pot like I use, this takes about an hour. If you use smaller pots it won’t take as long.
When your apples are cooked, this is a good time to start your canner and jars heating as I described above.
Let the apples cool just a little before you sauce them so you don’t get burned. Put them through whatever type of food mill you have, or — if they’re peeled and cored — mash them up, or puree them in small batches in the blender. If you’re using the blender, fill it no more than halfway; drape a towel over the lid; hold the lid down very tightly; and start the blender at a low speed before moving up to puree speed. Pureeing hot food in a blender can be a trifle hazardous if you don’t take precautions.
If you’re using the Kitchen Aid fruit and vegetable strainer attachment, here’s some advice: No matter how badly you want to try reusing the rejected coils of apple junk that oozes out of the end of the attachment, do not — I repeat, DO NOT — put that stuff back through the strainer. You may think you can be extra thrifty and get some more applesauce out of it if, perhaps, you mix it with water to soften it. No. Don’t do it. You will have strainer pieces flying across the kitchen, fruit splattering your cupboards and counter, and rock-hard fruit matter that you’ll have to pry out of the innards of the strainer. Just don’t. I know that if you grew up in a family or culture that reuses everything and throws out nothing, it hurts to see that apparently useful fruit in the bowl waiting to be thrown out. If it’s too much to bear, find another use for it. Feed it to the chickens. Let the puppy eat it. Just…don’t put it through the strainer a second time. Baaaaaad idea.
Pressing the stewed apples into the strainer
The setup for processing the applesauce
The inner workings of the fruit/vegetable strainer
Apple leavings: soft pellets of peel and core.
Applesauce.
However you achieve your transition from stewed apples to applesauce (and I highly recommend the Kitchen Aid strainer; I think a good, sturdy chinois would be second-best, with a food mill like my own coming in third), it’s now time to taste and reheat. This is the time to decide whether you want more (or any) sugar, if it needs more cinnamon, et cetera. These decisions don’t affect canning safety. You can sweeten and season to your heart’s content. You’ll find, I think, that most apples need very little sweetening; a quarter to a half cup of sugar for eight pounds of apples really is about right.
As you ponder sweetening choices, you should be reheating your applesauce. Bring it to a boil over medium-high heat, then turn it down to medium and let it boil gently, stirring occasionally, for a minute, paying attention to consistency. If it’s very thick and gloopy, drizzle in a bit of water until it’s smooth, continuing to heat it till it’s come back up to a boil. I realize this sounds vague and imprecise. That’s because the thickness of the applesauce will depend somewhat on the variety, ripeness, and quality of your apples. So you may need to add a little water, or you may not need to add any at all. Just make sure it’s easy to pour and boils easily without making big thick pops; otherwise it may not heat evenly in the canner, and you can’t be sure it’s been heated all the way through to a safe temperature.
Once the applesauce has boiled, lay a towel out on your counter — remember, it’s not a good idea to put hot jars onto a cool surface — close the window — because hot jars don’t like drafts — and lift the jars out of the canner onto the towel. Keep the water at its original level in the canner by pouring some of the water from the jars back into the canner, and some out into the sink. If you have a long-handled lid rack, lower it into the hot water once the jars are out. If you don’t, pour some of the hot water from a jar over the lids in a shallow pan.
Use a wide-bottomed funnel to guide you as you pour the applesauce into each jar, leaving 1/4 inch of space at the top of each jar. If you’re not sure you’re leaving enough headspace, this is a good time to use that notched green tool that came in the canning set you may have bought. You can also now use that tool to give each jar a zig-zag stir, to release any air bubbles inside. Or you could just give each jar a couple of good thumps on your toweled counter. If necessary, top off any jars that had large bubbles and have now lost fullness. By the way: Do you see how thick that applesauce is in the photos below? Notice the bubbles in the jar? That applesauce is just a trifle too thick — not so much that I was in a panic upon noticing it, but really I should have thinned it as I explained two paragraphs above to make sure it heated evenly in the canner.
Use a wide-bottomed funnel to fill the jars.
Carefully wipe the edges.
Jars of applesauce.
Get a damp paper towel or clean cloth. Carefully wipe the rim of each jar, using a fresh area for each jar, making sure there are no stray splashes of applesauce remaining on the edge that could disrupt the seal. Once all the jars have been wiped, place a flat lid onto each jar, checking for flaws as you go and discarding any that have problems (of course, you already did this once, but perhaps you’re as paranoid as I am). Then place the rings and tighten them down. Turn the heat on under the canner, and use the tongs to lower the jars into the water. Replace the lid and bring the canner back to a boil.
Process the jars for ten minutes. Just to be clear, the timer for water bath processing begins when the water boils, not when you put the jars into the canner. After ten minutes, use the tongs to pull the jars out and place them back onto the towels. Do not touch the tops of the lids. You should hear the gentle, musical pop of lids sealing fairly soon, but some jars could take up to 24 hours. I repeat, do not touch them while you wait. If you push the center down, causing a “forced seal,” it’s impossible to know whether that jar would have sealed on its own or not. So don’t touch them until they have all sealed and are thoroughly cooled, at which point you should be sure to write the contents and date on stick-on labels for each jar. Home-canned food can easily keep for a year.
If any jars don’t seal after 12 to 24 hours (or if you disregarded my stern command to not touch the jars, thus causing a forced seal), you have two choices. You could reheat the canner to boiling with the jars inside (I would gently unseal the forced-sealed ones first, using thumbs to push the lid off rather than a can opener, then put the lids back on), process for 10 minutes at boiling, and leave them again to see if they’ll seal. Or you could shrug and take what is most likely your single unsealed or force-sealed jar and put it into the fridge, where it will be the first jar of applesauce you’ll try out.
Applesauce is a perfect fall treat, but with apples available year-round in grocery stores, you could make this any time. It’s great for kids’ lunch boxes, as a side with roasted pork and sauerkraut, and myriad other uses. Enjoy!
Crushing the spices gently will release their flavors.
My favorite drink, in my favorite mug. (Yes, it was a gift from a student. A favorite student, too.)
Mmmmm. Delicious and beautiful, too.
For the past several months, I’ve been in pursuit of the perfect home-brewed chai. Chai is a word that simply means “tea” in several languages, but what we usually mean in America is an India-inspired strongly brewed spiced black tea made with steamed or hot milk. In coffee shops it’s often called a chai latte (though you have to use caution when ordering, because some baristas think you mean a chai made with both spiced tea and espresso, also known as a dirty chai). Chai has been a favorite drink since my first taste back in my early college years, when I daringly tried something new to impress my crush.
Living in Alaska, I contented myself with daily chai made from the boxed Oregon Chai concentrate available at Costco and local grocery stores. It wasn’t a mind-blowingly delicious brew, but it was sufficient to tide me over till I could venture out to our nearest Kaladi Brothers cafe and enjoy an Alaska Chai or Zen Chai. Those are two amazing drinks brewed in Homer, Alaska by Homer Brewing Company. The Alaska (sweeter) and Zen (spicier) chais are clearly heaven-inspired. No other chai has even come close to their perfection of flavors.
Well, almost no other — for awhile, Starbucks’s new Oprah Chai from Teavanah was a fairly close second. For about a year while we lived here in Oregon after leaving Alaska, I was able to enjoy a chai brewed by someone else on occasion on visits to Starbucks. Then they changed the formulation, and now it tastes like it was brewed using cinnamon-flavored Red-Hot candies. Yuck. So that left me stranded in Oregon with an okay but not amazing morning drink, and no weekend rescue from mediocrity.
One day I was grouching about my plight to my husband, Aaron, and he said, “Why don’t you just make your own?”
Why not, indeed? I started comparing ingredient lists from the chais I drink most often. Then I found a recipe for chai concentrate online by “thecatnipcat”, at tastykitchen.com, that had a good overlap of ingredients from my favorites. Concentrate, by the way, refers to the strongly-brewed, spiced tea that you make ahead and store until you’re ready to add milk for your morning cup.
We made a visit to a specialty spice and tea shop, which had most of what I needed and also had storage tins and a rotating nutmeg grater — a long-held secret desire of mine. The spice shop was a delight of scent and beautifully arranged shelves, but I’ll be honest: all of the necessary spices can be found in the bulk section of your local grocery store, for somewhat lower prices. Here in the Portland, Oregon area, I get most of it at my local Fred Meyer, occasionally having to search New Seasons Market if something isn’t available there. I strongly recommend using whole spices that are as fresh as possible. They’re pretty affordable in bulk, and the whole spices retain their flavor much better than packaged ground ones.
Having collected my spices, I began brewing small batches. I started by exactly following the original recipe I had chosen. Then I began tweaking subsequent batches, one ingredient at a time.
A dozen tries to reach perfection.Over the next few months, I made batch after batch until I had what is, to my tastebuds, an absolutely perfect blend of flavors. Aaron agrees: it’s perfect. I know he would enjoy a little more fresh ginger than I use, but too much upsets my stomach, so I was forced to dial it back a bit. I compensated by upping the black pepper and cloves for the spiciness he prefers. (Spoiler alert: If you scroll all the way to the bottom of this post, you can see a nice concise version of my recipe. You’re welcome.)
The reason I’m enumerating all these small preference changes is to highlight the point that you don’t need to get hung up on a recipe. If you hate nutmeg and love ginger, adjust accordingly. If you think you might like an earthy hint of chocolate (I didn’t — that was a dud of a batch), try adding carob to the brew. I do recommend following a recipe scrupulously the first time, though. Then, if you find it’s not exactly what you want, you can experiment by making just one or two changes at a time on subsequent batches.
However: I have it on good authority that this chai is perfect just the way it is. Twice I’ve brought my good friend Gini (who mentored our family through our very first ever trick-or-treating experience and has joined me in periodic sanity-rescuing play dates for our similarly-aged kids) a bag of the dry ingredients and instructions for brewing. And I don’t mind boasting: she raved about it. Then she shared some with a friend, who also waxed enthusiastic. That was the ego boost I needed, the final confirmation that yes, this is a GOOD CHAI.
So: First you’ll need sixteen teabags of plain black tea per batch (the traditional method involves loose-leaf, but in this case I’m happy to simplify). I get the three-packs of Lipton at Costco — I use tea a lot, especially in the summer, between regular batches of iced tea and chai. You’ll also need red rooibos tea, three bags per batch. (It’s an herbal tea from an African shrub, and it’s pronounced roy-bose.) Try to find an unflavored version, but if you can’t, a vanilla red rooibos will have less negative impact on your brew’s flavor than a chai rooibos. Celestial Seasonings has a vanilla red rooibos. The plain red rooibos currently in my pantry is Fred Meyer’s store brand, for fellow West Coasters. I find it in the coffee and tea aisle in the grocery store.
Spices: Seven whole cardamom pods, fifteen cloves, three star anise, three cinnamon sticks. You can gently crush these with a mortar and pestle to help release their flavor, though it isn’t really necessary — but I can promise you that it is really, really fun. Black pepper, fresh or pre-ground, 1/4 teaspoon (if you have whole, you’ll grind them before you add them). Nutmeg, 1/2 teaspoon. Fresh ginger, chopped, grated, pounded, or whatever is your favorite method of preparing it: 1 tablespoon chopped, which turns out to be 3/4 ounce. If you can’t find fresh ginger or run out unexpectedly, you can use about a teaspoon of powdered ginger — it won’t add as much fresh flavor or heat, but it’s definitely better than leaving it out. Orange zest (clementine or mandarin will work just fine, too), one teaspoon or more — I often just use the entire orange’s zest with no ill effects. Zest the orange by rubbing the washed orange firmly over the smallest grater teeth, if you don’t have a zester — covering the grater with waxed paper will help you free the zest when you’re done. I’ve used about three drops of orange essential oil a few times when I didn’t have an orange handy, too, though you have to be careful not to overdo it.
Crushing the spices gently will release their flavors.
Chopped ginger.
Mmmmm. Delicious and beautiful, too.
This brew smells too good to believe.
Boil ten cups of water in a covered saucepan. Once it’s boiled, turn the heat off but leave the pan on the burner. Add 3/4 cup of brown sugar, 1/3 cup of honey, the teabags, the assembled spices, and two tablespoons of vanilla extract. Cover the pan again and let it steep for twenty minutes. Enjoy the heavenly aroma as your house fills with the tantalizing scent of freshly-brewed chai. A small note: you can get away with using twelve cups of water if you want to make it stretch a little, but in that case I recommend brewing it just a little longer, and it still won’t have exactly the same flavor.
After twenty minutes, pull out the teabags — they’re compostable, by the way, if you’re into composting. Don’t squeeze the bags, or your chai will be bitter. Just let them hang over the pan for a few seconds to drip. Strain the chai into jars for storage, and yes, you can compost the spices too. I put a small strainer into a wide funnel to make pouring without spilling easier. This batch will fill two quart jars plus a half-filled mug to drink now, with sometimes a little extra that you’ll need to put into a small jar or share with someone. I know this vagueness is irritating the mathematically minded readers: ten cups of water going into the pan ought to equal ten cups of chai concentrate going into the jars, right? No. Some of the water will evaporate when it heats and boils, even with a lid, and especially if you didn’t listen to me and didn’t bother covering it. And the teabags will absorb some of the liquid, too.
You can enjoy the chai several ways. The easiest way, and the method I usually use, is to fill a mug halfway full of chai concentrate, then top it off with milk, and microwave it. You could also start with a mug filled halfway, microwave it (for a shorter amount of time), and top it off with steamed milk — yummier and more fun to drink, but more time consuming…and of course it requires having an espresso machine or milk foamer. Finally, you could drink it cold: fill a glass half full of concentrate and the rest of the way up with cold milk. Oh, and of course you could use it to make a citrus chai spritzer. You might find you want it a bit sweeter for the spritzer — just add a bit of honey or simple syrup.
I’m not exaggerating when I say that I put months of work into this perfect chai brew — but trust me, I won’t be offended if even my best friend confesses to altering the recipe a bit. That’s part of the joy of making this kind of thing at home. Brew away, change it however you want, and feel free to share this truly magnificent and amazing recipe with permission to adapt as needed. Enjoy!