Anything For a Year

My dad used to say, “You can survive anything for a year.” While there are obviously some exceptions to this observation, it’s a useful point to keep in mind. If you know a difficult circumstance will have an end point, the hope of a better time can keep you going. It’s especially helpful if you know the time frame; it’s not so easy when you have no way to gauge how long your circumstance will last, or how to move out of it.

I’ve been thinking about milestones, years, enduring, and survival lately. Today, after I loaded photos from Sofia’s second birthday, I began going through our photos, deleting duplicates, unfocused shots, and other unwanted photos. As I was deleting literally hundreds upon hundreds of photos (about 1600 today), I came across two photo shoots I’d forgotten about — in fact, I believed they hadn’t taken place, and for nearly two years I have been regretting their absence. When our daughter Sofia was born, we planned to take photos each month of her first year, posing with a blue-striped lamb. I was so exhausted those first few months, I promptly forgot about these photos after I took them at her one- and two-month birthdays. I was delighted today to discover they existed, but at the same time, I was unprepared for the rush of emotion they brought.

Looking at these photos brings back some fairly traumatic memories. I’m not exaggerating: those first five months were horrific, and in fact Sofia’s whole first year was difficult. She had both colic and a dairy sensitivity, and while eliminating dairy from my diet helped a little, the colic symptoms remained. Those first few months, I averaged two hours of sleep a night. And those hours often consisted of bits and pieces of time: half an hour here, forty-five minutes there. By the time she was a year old, I generally got five hours of sleep at night and considered myself lucky.

It wasn’t just the nights that were difficult. It was nearly impossible to put Sofia down for more than a few minutes at a time. Those photos above were the result of holding Sofia in the Ergo baby carrier for hours until she dropped off to sleep, then gingerly lowering her onto the bed to snatch a few photos, until she awoke once again with screams. Then another quarter hour or so of comforting, then more photos, and so on until the light changed too much for photography. There were far more photos of blurred fists pumping in rage, mouth open in anguished wails, than there are of these peaceful moments. In fact, as I looked at the sweetly resting little girl in the photos, I could hardly believe these pictures were real. My memories of that time consist mainly of tears, rocking, walking, bouncing, and nursing.

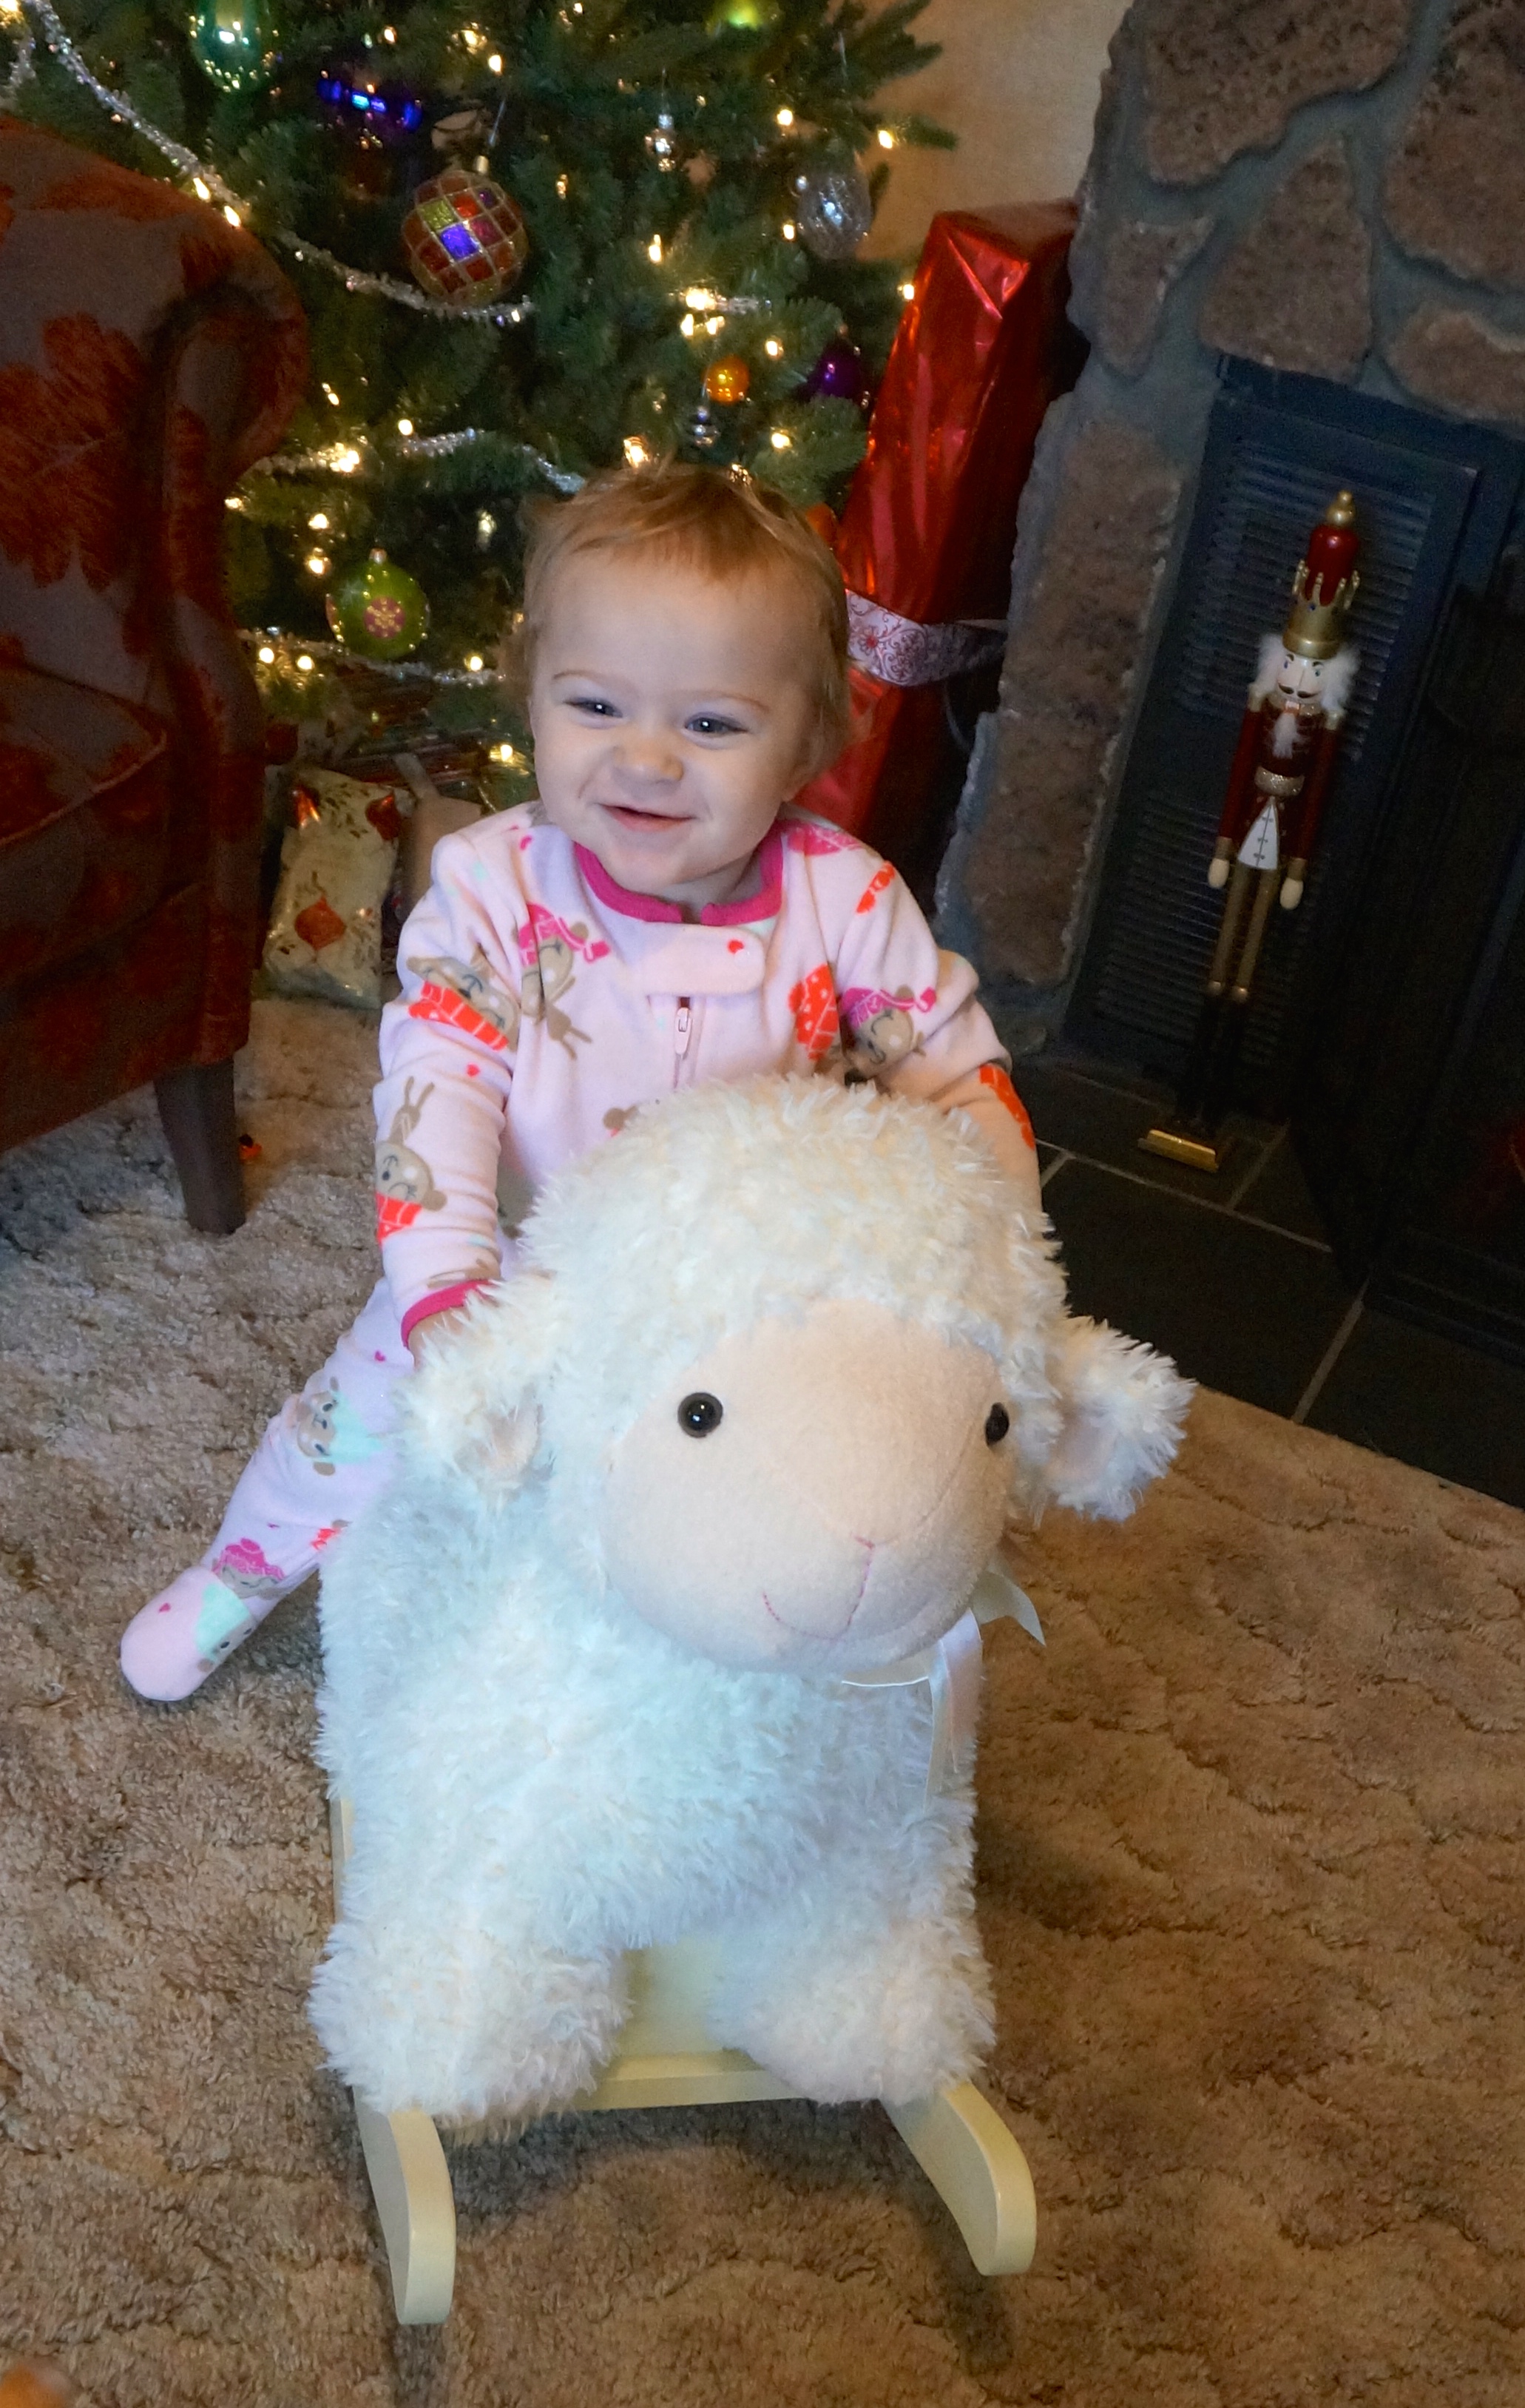
As I mentioned, Sofia just celebrated her second birthday. She is now a cheerful little girl, all smiles and giggles. She rarely fusses, and quickly returns to sunshine after a little grouchiness. She runs around after her big brother, who just turned five, doing her best to imitate his every move and word. Her birthday was a simple affair, with just the four of us celebrating at home.  She listened with a big grin while we sang “Happy Birthday,” and then blew out her candles just as if she’d been practicing for the occasion. Later, she proved herself to be a good sport by posing for me with the lamb we got when she was born. Her birthday was as lighthearted, simple, and fun as she herself is.

The juxtaposition of these second-birthday photos with those first- and second-month photos is jarring with the contrast in memories. Those first two months, I knew theoretically that things would get better. Had to get better. No child can scream and demand to be held for eighteen years, right? Surely it would end. But I couldn’t see it, couldn’t even visualize a better time. I occasionally remembered my father’s words — “You can survive anything for a year” — and shuddered. A year of this? I was pretty sure I couldn’t, in fact, survive it.

But around five or six months, things took a turn for the better. Sofia learned to crawl, and began to enjoy real food. She smiled frequently. She was able to lie on the floor or in a playpen for fifteen minutes, half an hour, finally forty-five minutes at a time. She began to nap in a swing instead of only in my arms. I was able to sleep for a solid hour or more at night between waking, then for two hours, and then for an occasional three-hour stretch. Five-hour nights became the norm, then six-hour and even sometimes seven-hour nights, snatching sleep in two- or three-hour increments.

By one year old, she was walking, running, climbing. Trying new words. Smiling more than crying. She rarely needed to be held except to nurse. She mastered a bottle, then a sippy cup, filled with almond milk, as she still couldn’t handle cow’s milk or even gentle formula. Finally, the time came to wean her, and it was like a miracle: she began to fall asleep on her own, without nursing or being held. 

Now, at two years old, she falls asleep readily at nap time and sleeps for two or three hours, twice a day. She goes to sleep at bedtime as soon as I put her to bed, and rests all night long. She rarely cries, and then only for a short time. Smiles are the norm. Words increase daily, as do her adventurous attempts to mimic her brother.

What I’m saying is, This too shall pass. Or, in the words of my father, “You can survive anything for a year.” You really can survive a lot, if you know it will end. I survived five months of constantly holding a distressed baby with next to no sleep nightly. I didn’t think I could do it, but here we are.

I’m thinking of the new parents out there who are enduring the same sleepless nights, the screams that can’t be comforted, the hours of walking the floor. It feels endless. It feels hopeless. But I promise: It will end, and you will survive. One day, you’ll look into your sweet child’s laughing face and shake your head as you remember the distant past, when you believed you couldn’t do it, when you wanted to give up. You’ll wrap your arms around your toddler, whom you love with your whole heart, and you’ll smile as you realized: You did it. It’s over. You made it.

You can survive anything for a year.

Advertisement

Slugs, Begone!

We have a slug problem. I first noticed while doing a pre-spring weeding in the flower and vegetable bed, when I kept turning up the slimy little nibblers in the soil. Then I noticed chunks bitten out of new shoots. Recently, I saw flower buds with bites. But Thursday’s transgression was the worst yet: dwarf iris’s first delicate blooms, the year’s second flowers (hellebore beat them by a week), bitten to pieces! Unacceptable.

Slug-eaten iris. Last straw!

At lunch, I broke our house rules, opened my iPad at the table, and did a search for “slug deterrents.” I found an illustrated article at WikiHow that gave me several ideas, two of which I put into practice.

The first one I’m trying is the cornmeal method. Very easy. Dump cornmeal into a jar. Lay it on its side. The slugs smell it, crawl in, and die, because…I’m not sure why. The article says the texture is too rough, but I’m not sure if it cuts their bodies up or if they die from eating it. Either way, it’s so easy I had to try it.

The second approach I decided on is the yeast-and-honey method. I boiled yeast and honey together, about 1/2 cup each, in a half gallon of water.  I hesitated over the boiling instruction at first, since it would kill the yeast. But then I concluded that this might be a good thing; otherwise we’d have yeast bubbling all over the garden.  I poured the mixture into jelly jars (I wanted to use plastic disposable cups, but we had none). Then I dug a hole in the garden near a patch of tender shoots using my nifty transplanting tool, and sunk a jar into a hole. The idea here is that the slugs will be attracted to the smell of the mixture, crawl in, and be unable to escape, drowning. I only got to place one jar, though, because it was at this point that Sofia did a face plant into a patch of mud and had to be taken inside. Ah, the hazards of gardening with babies on rainy days…

We shall soon see how these are working out! Already, taking Cody out for a bedtime potty venture, I noticed that a cornmeal jar near the back door had attracted two slugs. I’m hopeful that I can save my emerging blooms. To see how these methods worked out, click here.

Glamour Girl

I have a problem. Maybe it’s vanity, maybe it’s rigidity of routine, but whatever the cause, it’s this: I cannot leave my home without makeup. In fact, if I don’t apply makeup even on a day I plan to spend home alone with kids and no husband, washing dishes and digging in the garden, I still feel oddly incomplete. It feels like something minor yet nearly essential is missing, like a fingertip or an earlobe. It feels simply wrong.

I wish I weren’t like this. I wish I didn’t feel the need to extra-feminize and perfect my face for even the most simple human encounter. I wish I weren’t still writhing in shame for having greeted the UPS carrier yesterday with a face bare of makeup except for mascara and tinted lip balm (plus, unfortunately, Capri-length yoga pants paired unflatteringly with too-long socks). I wish I could wear cosmetics as a deliberate, occasional choice, rather than a compulsion.

I remember when my rigid routine began. I was maybe fourteen. Makeup was new to me, and I was at the age when kids on the Christian commune where I grew up were sometimes given occasional, informal lessons on etiquette and rather old-fashioned comportment. For girls, this involved exercises like walking with books on our heads, standing with our feet angled just so, practicing lowering ourselves gracefully with knees together and spines straight to retrieve a dropped item, and setting a table correctly.

And we learned to apply makeup. Just like the lessons in comportment, this was informal — and not, I realize now, meant to be part of that curriculum. One of the “aunts,” as we called many of the women around our mothers’ ages, was a Mary Kay consultant, and she would sometimes hold parties at which the teenage girls were especially welcome. She’d show us, step by step, exactly what to do: how to apply makeup in a ladylike and reasonably modest manner. She gave us pointers like “Never wear eyeliner without lipstick” and “Always put on foundation.” And she told us, gently, firmly, and repeatedly, that a lady always applies makeup before leaving her home.

I know she wanted to give us an edge in life, the advantage of beauty and confidence. She couldn’t have known to what ridiculous extent I would internalize her advice. I don’t know why I was so susceptible to suggestion in this area, but somehow her iron-strong will, clothed as it was in charm and elegance, imposed itself on me.

My mother rarely wore any significant amount of makeup, but she had no problem with my own dabbling. She even showed me the basics and helped me buy and apply my first cosmetics. And, possibly knowing that I was in danger of being influenced away from her nearly-feminist tendencies, she gave me her own makeup advice: “Use makeup to highlight your best features, not to paint on a new face.” It’s good advice, I think. Thanks to her, I keep my makeup minimal, sometimes nearly invisible. But it’s there.

These days, Sofie is extra-needy in the morning before breakfast, and I often find myself applying makeup with her on my hip. She watches in the mirror, smiling to see our faces together. Her baby hands reach out for my tools. Occasionally her success results in mascara-blackened fingers or a scraping of blush under her tiny fingernails. Sometimes I hand her a fluffy brush, and she chuckles as she strokes first her face, then mine. I love sharing these moments, but part of me cringes.

I want you to be braver than I am, I want to tell her. I want you to be bold. I want your confidence in yourself to be unconnected to your makeup skills. I want you to show the world your real face without shame.

But another part of me looks forward to teaching her how it all works. First foundation, next cover-up, now blush… Never wear eyeliner without lipstick… Use lip liner so your lipstick doesn’t smudge. I want to dive with her into a new world of grown-up glamour. Nail polish, high heels, the perfect stockings for that special party dress.

In the best scenario, we’ll find balance. She won’t hear a lovingly firm, well-meaning, Southern-tinged voice in her head, telling her that a lady should never leave her house without makeup. I’ll remind her that cosmetics should be used to complement her best features, not give herself a new face. And I’ll give her my own advice: “Only wear makeup if you feel like it. Take a break now and then. Be brave. Don’t let anyone else tell you how your face should look.”

And maybe, just maybe, Sofia will go into the world with confidence and beauty, free from the need to change her face to satisfy someone else’s idea of what women should look like.

IMG_2197.JPG

Spidacheos and Fuuuuks

When Niko was first born, a tiny, sleepy bundle, I remember Aaron saying, “This is the best stage, isn’t it? We can just hold him all the time. I love holding him when he’s sleeping.” And I agreed. It was definitely the best stage.

Sleeping in Daddy's arms
Sleeping in Daddy’s arms

Then Niko started holding his head up, making eye contact, smiling. And one of us said, “This is definitely the best stage. Look at that smile!” And so on. Each stage was the best stage ever. Each time he changed, had a developmental leap, learned a new thing, it was the best thing ever. Every time. But to me, there was one stage that really, really was the best: learning to talk. I loved hearing his tiny voice saying new words, completely unaware and uncaring that his pronunciation was imperfect. It was absolutely amazing.

Niko, three months old

With Sofie, it was a little different. She hit her developmental milestones appropriately, no concerns. But it wasn’t until she was about four months, nearly five months, old that she really became enjoyable. The one thing that united all her stages up to that point was the constant crying, the nightly screaming, the continual need to be held. So we didn’t talk as much about how each stage was better than the last. Until, as I said, around four and a half months. Suddenly, she was smiling, making happy noises, trying to sit.

That smile: pure miracle.

Now she’s a month past one year old, and she’s walking, running, climbing… and working so hard on talking. She’s evolved in her attempts at Niko’s name, from “O” to “Ko” to, today, “Geeko.” Cody, the puppy, was first called “Co” and now is “CoCo.” When we give her something, she says “Tah toooo!” for thank you, and she greets us with “Hey youuuuu!” Today, her newest word came trilling out when we went into her room to get her when she woke up this morning: “Wake!”

Such a big girl.
Such a big girl.

Yes, without a doubt, Sofia is in her best stage yet.

I just love the learning-to-talk stage. I remember when Niko was about 15 months old and was learning to say “fork.” He couldn’t say the “r” sound — still has trouble with that one — so it came out, in a loud, excited voice, “Fuuuuck!” We had to explain to servers and fellow diners at restaurants: “He sees a fork. A FORK. He’s very excited about that FORK!” It was pretty funny. We have a lovely video of him saying this, getting more and more intense in tone, until the fork he’s holding suddenly pokes him in the eye. The video cuts out as we rush to comfort him, but there’s a subsequent one from a few minutes later, in which he eyes it soberly: “Fuuuck.” The tone fits the situation so perfectly that I can’t help but laugh till I cry, every time I see it, despite the pain I know he experienced.

But the best part about the learning-to-talk stage? It doesn’t really end, not for years. Niko, at age four, loves words and is constantly trying new ones and asking for word meanings. He actively explores the language with joy and pleasure. He loves the feel of a new word in his mouth. He’ll say it repeatedly, in different settings, trying it until it feels right. Most recently, he attempted to say the name of the delicious new nuts he was trying: “Spidacheos!” It made us laugh, but it fills me with a sort of pre-nostalgia, too. I know that one day we’ll look back at this time of exploration and learning and say, “This was the best stage ever.” And it will be true.

(You can see videos of Niko saying “Spidacheos” and “Fuuuuuuck!” on my Facebook page; apparently my blog doesn’t have video enabled right now.)

Fluffy Tutu

Sofia turned one last month, and we celebrated with a cake smash photo shoot. I made a polka-dot cake, decorated a plain white backdrop with a simple birthday banner, and dressed her in a pretty blue-and-silver tutu I made for the occasion. The polka-dot cake was a surprisingly successful learning experience, the birthday banner was an easy last-minute impulse craft, but the tutu is what I’m really proud of.

I had an idea in my mind of how I wanted the tutu to look, but I couldn’t find a tutorial online for one that worked with the materials I had on hand. So I just struck out on my own, designing as I went. I started by pulling out the tulle I had stored away in a bin. I had a swath of pretty, rich, blue tulle, some silver sheer fabric (not really tulle, but I made it work), and lots of white tulle. Then I opened my ribbon box and found some narrow, sheer, silver ribbon. I rummaged through my sewing box till I found a pack of wide elastic. (The silver butterfly in the photo is for a headband that I planned, but didn’t have enough fabric to finish.)

I wanted the tutu to be fairly long. To decide how long to cut my pieces, I put Sofia into a dress she has with a tutu skirt, made a note of where the waist fell, and measured the skirt. The tutu I wanted to make would have a waistband, while the tutu part of the dress we tried on started a bit below her waist, so I added another inch to the length, plus another inch for a seam allowance. For Sofia, that put the desired fabric length right around 8 inches. I used her body to measure my elastic waistband, too. I didn’t want the elastic to have to stretch in order to go around her waist, so I just circled her waist snugly with the elastic and cut it to that length.

To make a layered look that showed off the blue and silver, I cut each piece 4 inches wide. I didn’t have a whole lot of the blue and silver. I just kept cutting until I ran out, then cut about as much white as I had of both blue and silver. On my dining table, I laid out my strips in alternating, overlapping colors: white, blue, white, silver, white, blue… I arranged them so that each one overlapped the previous by about half its width.The white was barely visible, but it added needed bulk. My goal was to have a row of overlapping fabric that was about twice the length of the elastic I’d cut for the waistband, but I didn’t end up having that much on hand. If I’d planned ahead, of course, I could have calculated how much I needed and purchased accordingly. (This is what we call Crafting With ADHD. Seriously. It usually works out anyway.)

Once I’d laid out the whole array of fabric, I used matching blue thread to baste the fabric pieces together. Basting is stitching in such a way that the thread is easily pulled, either for temporarily holding fabric in place, or for gathering. I started by pushing the needle all the way through the first layer of fabric, drawing the thread through, then tying a firm knot in the end so it wouldn’t come pulling out prematurely. Then I alternated long stitches and short stitches (but not tiny ones — that would make the thread hard to pull later), making sure to catch each strip of fabric at least once. I basted all the way across, and then laid out the elastic band next to the fabric. Finally, I gathered the basted fabric together by gently pulling on the loose end of the thread, pushing the fabric back toward the knotted end, until the width of the basted-together fabric matched the length of the elastic. To secure the fabric, I quickly stuck a pin into each end of the fabric to hold it to the elastic.

Next, I turned the whole thing over and pinned the fabric to the elastic with sturdy quilting pins, folding the fabric over the elastic with a bit left over to tuck under. I put a pin every few inches. Since the fabric was already basted and gathered, I didn’t need a lot.

With the fabric pinned down, I used a needle and the blue thread to hand-stitch the fabric over the elastic. I used what I was taught to call a blanket stitch, though it’s actually more of a hybrid between the blanket stitch and a catch stitch. (The first link in the previous sentence goes to an instruction manual from Coats & Clark, 1959, and has instructions for both stitches; the second one is a more detailed tutorial for the catch stitch.) Using my thumb as a guide for stitch width, I pushed the needle down and back up in a right-to-left direction at the end of each stitch, then looped the needle through the stitch to secure it before the thread pulled all the way through. Setting the end of the stitch backward like that, plus catching the thread in a loop, makes this a very secure stitch. I just barely caught the front layer of fabric with the needle — the stitches don’t show at all. Each stitch caught the very edge of the elastic fabric, keeping it secure so it didn’t roll inside the waistband. Finally, I whip-stitched the two ends of the elastic band together. Stitching the waistband took me about twenty minutes.

If you have a good sewing machine and don’t mind the stitching showing through to the other side, you could just machine-stitch it, but I wanted invisible stitches — and, having been raised without electricity, I’m more comfortable with hand-stitching anyway. I should also add that this is NOT a good method to use if you want the elastic to stretch a lot. I fit the elastic band to sit gently on Sofia’s waist, so it only has to stretch a little as it goes over her hips — stretch it too much, and the stitches will start snapping. If you wanted the elastic to fit more snugly, you would stretch a shorter elastic length over the ungathered, basted fabric, pin along its length, and release it, letting the elastic do the gathering.

At this point, I could have been done. However, I didn’t think the finished product was as fluffy as I’d wanted.  If I’d had more fabric and could have gathered the tulle more tightly, or added another layer or two, it might have been fine. But I really wanted more pouf. I remembered a pretty tulle fairy dress I’d seen when searching (in vain) for a tutorial. The creator had used little tulle pieces to tie off the ends of the long tulle strips, and it had made a deliciously frothy bottom of the skirt. I knew I couldn’t recreate the look with what I had, but it did give me an idea for something a little similar. I used blue tulle pieces to tie off the white and silver strips, and silver ribbon to tie off the blue tulle. And voila! A sweet little tutu was born.

Birthday Polka-Dot Cake

Sofia turned one during the second week in December, and we decided to do a cake smash celebration with her, like we’d done when Niko turned one. I wanted a cute cake for her to smash that would coordinate with a perfect outfit for marvelous pictures. Aaron suggested that I make a polka-dot cake. I was mildly hesitant, because it seemed complex, but when he showed me a cake pop pan he’d found, I decided it seemed doable.

It was simultaneously easier and harder than I’d expected. First, of course, I did a search for how to make a polka-dot cake. I found a blog called “Once Upon a Pedestal,” by Deborah Stauch, which featured a tutorial for a polka-dot cake. Later on, after I’d gone through the whole process of making the cake, I found another blog, “Easy Baked,” which had a polka-dot cake tutorial that included some troubleshooting ideas that the original post didn’t have. This one was actually referenced by Ms. Stauch, and the author used Ms. Stauch’s instructions for her own cake. I wish I’d seen it when I was originally looking, because I ran into some problems.

Basic steps: Use two cake mixes; color one batch however you want your polka dots; bake your cake pops till they’re just done; surround them with the second batch of batter in layer pans; bake them a second time. Simple. Easy-peasy. Right? Ha.

The tutorial I followed suggested adding pudding mix to the cake mix. The idea was that this would make the cake denser, and the circles would be less likely to float. Unfortunately, what I thought was pudding mix in my cupboard was, in fact, Jell-O mix. Then I realized that my cake mix was a pudding cake. Problem solved! I thought. Ha.

Another instruction I didn’t follow was to use two cake mixes. I only wanted to make two layers in itty-bitty pans, not the three layer pans that the original tutorial suggested, so I thought one mix would be just fine. Incidentally, upon measuring (later, of course), I discovered that my mini pans were the same size as the pans Ms. Stauch used: six inches across. So one mix wasn’t enough even for my two pans. My guess is that if I’d done two, I’d have had enough to do seven balls per layer, rather than six, and also cover them more thoroughly in the pans.

I mention these errors just in case someone else reading this thinks taking shortcuts is a great idea. I think the cakes would have been MUCH easier, and looked better, if I’d just followed the instructions. What actually happened: the batter didn’t sufficiently cover the cake balls, and they floated up above the surface of the cakes. I salvaged them by covering them with a damp paper towel and setting another pan on top. It worked okay, but it could have been better.

Anyway, the end result was surprisingly pretty, considering all my mistakes. I measured out enough batter for the balls and tinted that batch with Wilton Moss Green gel coloring. I tinted the rest with Wilton Creamy Peach gel coloring. I baked the balls first, of course. Using my 12-ball Nordic Ware cake pop pan, I baked them for exactly 12 minutes at 350 degrees. This was the one thing that worked perfectly. They came out a beautiful soft green with not even a touch of brown, and all but one popped out of the pan without a hitch. You can see how they looked in the photos below.

Then I poured a little bit of the peach batter into the 6-inch baking pan (actually too much batter — it pushed the balls upward as it rose), arranged 6 balls in each pan, and poured the rest of the batter over. As you can see in the photos below, it really wasn’t enough batter to thoroughly cover them. A little more would have been better. I then baked the cake just like a normal cake. Afterward, I had to weigh down the top for 10 minutes, using a damp paper towel topped with another pan, to press down the round top with protruding green balls. This wouldn’t have been necessary if I’d just followed the directions.

I used whipped cream for the topping and filling. I used the peach for this, too. I used a flat metal spatula (like a giant butter knife), dipped in hot water, to smooth the sides. I’m not an expert; it didn’t turn out perfectly smooth, even though I spent an inordinate amount of time in the attempt. But it looks a lot better than it did before Aaron, who’s actually got some experience with cake decorating, suggested the hot-water method. Then, for the top, I used a flower tip on a pastry bag to make little flowers all over, and I dropped a pale-green sprinkle into the center of each flower. For a final touch, I poured more sprinkles around the bottom of the cake to make an irregular band of pale green.

It was a bit of an anxiety-causing process, doing all this work decorating a cake that I couldn’t be sure would look pretty when I cut into it. And I had no backup plan, of course. When I finally cut into the cake just before getting Sofie dressed for the cake smash pictures, I was so relieved at seeing how well it turned out. Polka dots in more or less appropriate places, colors complementary to each other, no horribly obvious flaws, and it looked adorable with the tutu and birthday banner I made for the occasion. Whew!

Birthday Banner

Sofia just had her first birthday, and we celebrated by dressing her in a tutu and smashing a cake. Of course I needed pictures, so I set up a sheet for a plain background. We’ve done this before, for Niko’s one-year-old cake smash and for family photos, and it’s seemed fine. But this time, as I looked at the white sheet draped against the fireplace, it just looked…inadequate.

I was feeling a bit doubtful about the photo shoot, anyway. I’d made Sofie a pretty blue-and-silver tutu and had considered making a matching blue polka-dot cake, but I let Aaron talk me into doing a more girly peach and green cake. I wasn’t sure how the photos would look with two completely different color schemes.

And then, inspiration hit — during my two hours home during Niko’s preschool morning, of course, on the morning of the day I planned to take Sofia’s pictures. There’s nothing quite like a deadline to inspire. What I needed was, of course, a sweet birthday banner pulling three of the colors together. Out came my big pad of  12×12 scrapbook paper. I found three pages that were just right — a soft peachy orange stripe, and two subtly patterned pages in a pretty blue and mossy green.

Then I went to the computer and found a font that could easily be converted to an outline — Marker Felt. I enlarged it to 250 point, changed it from black to empty outline, and printed it out: “ONE YEAR OLD.” If I’d had my craft stuff properly organized, I’d have done this on my Cricut cutter. But printing it and then cutting out the letters worked just fine. After I cut the letters, I cut triangles from the colored paper. I made sure they were identical by folding the paper into quarters, then cutting diagonally. With the font size I chose, this made just the right size of triangles.

Next, I glued the cut-out letters to the triangles, using stick glue so the letters didn’t get bubbles or become warped. I got some pale green narrow satin ribbon out of my box of crazily tangled ribbons (pausing to re-skein and sort them), and measured it against the fireplace wall to make sure I had enough length. I carefully glued the triangles along the ribbon, spaced to make two swags. Then I hung it across the white backdrop. It took a few tries to get it balanced just right, but I managed it… just in time, too, because 11:00 came just as I was tying it off, and I had to leave to go bring Niko home from preschool. The whole project took exactly an hour and a half, and that included nursing Sofie, changing her diaper, and rescuing ribbons and paper triangles repeatedly from her curious fingers.

When I sat Sofie in front of the backdrop with her cake, I felt an exquisite relief: The birthday banner accomplished its hoped-for task of pulling together the disparate colors. It made a bright, cheerful setting for the first-birthday photos. Success!

Paint Baby’s Toenails: A Realistic Tutorial

IMG_0758.JPG

Recently, we had the supremely talented Garrett Beatty of Nuro Photography come to our home for a fall photo shoot – our very first professional family photos. (This is not a testimonial, but I’m just saying, this guy is AMAZING.) I thought this would be a great opportunity to paint 10-month-old Sofia’s toenails a bright color, envisioning a closeup shot of sweet, chubby baby toes. I had painted her nails once before, a pale, sheer, almost invisible pink, so I already knew this would be no easy task. Naturally, I turned to the Internet for help, realizing a bright coral would be much more problem-prone than sheer pink. And I have to tell you, the Internet really let me down. Tutorials for baby nail polish application? Barely there. I did find one article in eHow. It included this quote:

“Softly hold baby’s foot in your non-painting hand…Take brush that you prepared and gracefully dab each of the five toe nails. Bend your head down and gently blow on the toes to dry them a bit.”

Gracefully? Those that know me know that there are very few things I do gracefully. Walk down a hallway? Nope. Eat a sandwich? No way. Dance? Definitely not. Is it likely I’m going to GRACEFULLY dab near-permanent color onto the toenails of my squirming little darling? Not at all. Not going to happen.

Since I wasn’t finding much help at eHow, I decided to create my own, more realistic guide, complete with three different approaches. Maybe it will help someone out there.

Approach 1
1. Collect all your materials ahead of time:
*Baby (preferably yours)
*Nail polish – if Baby is a toe-nibbler, take the extra time to find a non- toxic version like Piggy Paint (Sofia isn’t, so I just used my own nail polish)
*Nail drying spray
*Towel or sheet that you don’t mind destroying
*Q-tips
2. Place Baby on towel or sheet.
3. Capture Baby before she reaches for the lamp’s power cord. Replace Baby on towel or sheet.
4. Reposition wiggly Baby on her back, legs toward you, with a fascinating toy in her hands. Wrap your legs gently around her legs so her hands can’t reach her toes.
5. Open bottle of nail polish. Wipe most of the polish off, since those toenails are TINY.
6. Grip Baby’s foot, angling toes toward you. Use your thumb and finger to immobilize the toe you’re aiming for, while your other fingers and your palm wrap around the foot.
7. One toe at a time, carefully but quickly dab polish onto the nail. That toy won’t hold Baby’s attention for long.
8. Sadly observe that the polish smeared from nail to skin, as Baby’s nails are actually smaller than the brush. Remind yourself that she’s having a bath tonight and it should be easy to wipe the nail polish off her damp skin. Use a Q-tip to get off what you can. [I don’t recommend using nail polish remover on a baby’s skin if you can help it…smearing nail polish on is probably bad enough without compounding the problem.]
9. Quickly apply the nail drying spray.
10.Repeat steps 5-7 with the second foot.
11. Realize, aghast, that Baby has somehow managed to smudge polish off three nails from the first foot and onto…oh no!…the carpet, despite all your precautions.

Approach 2
1. Collect materials:
*Baby with partially painted, somewhat smudged toenails
*Nail polish (see above)
*Nail drying spray
*Q-tips
*Cuddly blankie
*Rocking chair
*Feeding mechanism (bottle, breast, etc.)
*Crib
2. Put Baby to sleep using blankie, chair, and feeding.
3. Open nail polish, wiping almost all of the polish off the brush and leaving only a tiny corner of the brush wet.
4. Grip Baby’s foot, angling toes toward you. Use your thumb and finger to immobilize the toe you’re aiming for, while your other fingers and your palm wrap around the foot. [This is still necessary. Babies don’t stop moving just because they’re asleep.]
5. Quickly and carefully dab nail polish onto the smudged nails.
6. Apply the nail drying spray.
7. Hold your breath as sleeping Baby twitches and jerks foot away from the spray.
8. Repeat steps 3-7 with second foot.
9. Place baby in crib. Observe smudges that have already, as if by malevolent magic, appeared on tiny toes.
10. Repeat steps 3-7 with both feet. Tiptoe away, satisfied that you’ve achieved near-perfection.
11. Return when Baby wakes. Examine toes and wail when you discover that three toes on right foot and two toes on left foot have had polish smudged completely off. Consider writing angry letter to nail drying spray manufacturers.

Approach 3
1. Collect materials:
*Hungry, wide-awake baby with several smudged toenails
*High chair
*Finger food
*Nail polish
*Nail drying spray
*Q-tips
2. Place Baby securely in chair. Apply finger food to chair’s tray.
3. Open nail polish, wiping almost all of the polish off the brush and leaving only a tiny corner of the brush wet.
4. Awkwardly hunch forward so as to be level with Baby’s feet. Grab a foot, angling toes toward you. Use your thumb and finger to immobilize the toe you’re aiming for, while your other fingers and your palm wrap around the foot.
5. Quickly and carefully dab nail polish onto the smudged nails.
6. Apply the nail drying spray.
7. Release foot. Yelp with dismay as Baby stretches, pressing toes onto underside of high chair’s tray.
8. Despite burgeoning conviction of doom, repeat steps 3-6 with second foot.
9. Once again, realize that toes have already become smudged. As color still remains, decide that you don’t really want that close-up shot of baby nails after all, and that this is good enough. Glumly eat your own lunch while Baby gleefully kicks freed toes against high chair tray.

And that’s all I’ve got. I think I understand why no one else has ventured to write a paint-Baby’s-nails tutorial…and why eHow’s article isn’t illustrated. It’s because this is an impossible task. I take it all back – ignore the steps above. Refrain from painting your infant’s toenails. Your longsuffering Baby will thank you.

Evening Tomato Harvest

IMG_0387.JPGThis evening I had a small helper while I picked tomatoes. The plant you see sprouted on its own around June in a vacant section of a wheel-shaped garden, and since it wasn’t competing with anything I had planted, I let it grow. It has large orange cherry tomatoes with an extra-vivid flavor. What a delicious accident.

What you can’t see is the main tomato bed, in another wedge of the wheel-shaped garden. Every time I go out to pick tomatoes, I am reminded that sometimes a good piece of advice is worth doing a little extra work. This spring, as I was excitedly transplanting my very first baby tomatoes, my mother-in-law – visiting from Alaska – suggested tactfully that I might consider spacing them farther apart. “Sometimes tomatoes can really take off. They can outgrow their space quickly. These look a little tight to me.” I had already dug their holes and put the seedlings in. They looked so delicate and innocent, I simply couldn’t imagine them burgeoning into rebellious space hogs. And I was deep into transplanting strawberries. I didn’t want to replant the tomatoes. So I chose to believe they would remain staid and obedient.

They didn’t, of course. Now, each time I harvest tomatoes, as I tunnel headfirst into the vigorous vines and fight for a handful of bright red fruit deep in the thicket, I remember: “Sometimes tomatoes can really take off.”

Maybe next time I’ll listen.