Sock Bunnies

Last year, as I was thinking of filling Easter baskets, I decided I wanted to make special stuffies for the kids.  As I scanned the internet for easy ideas, I came across a pattern for a sock bunny. I loved the idea, because Niko had a thing for collecting and playing with socks at the time, so we had quite an assortment of socks that were either worn or had lost partners. The bunnies were so easy to make, and so loved by the kids, that I thought I’d share my process. I made a few changes to the original pattern, which you can see by clicking here. 

First I chose two socks, one for each bunny, that were tall enough to work with and not too worn. Of course, you could use new ones, but I liked the idea of upcycling what we already had.

I wanted the bunnies to be heatable, so instead of using regular stuffing, I used rice, because it works well for heating in the microwave. You can see in the picture that I used two types of rice, arborio and jasmine. This wasn’t for any creative reason, I just didn’t have enough rice to use only jasmine. I used the socks to measure the rice ahead of time to make sure I had enough.

To give them  a comforting aroma, I scented the rice with a couple of drops of essential oil. Lavender oil is traditional for bedtime and relaxing, but since we all had miserable colds, I went a different route. Niko’s first, beloved babysitter always used DoTerra’s OnGuard oil when Niko or anyone else in her home was feeling under the weather. She would dab it onto the bottoms of his feet, avoiding the sensitive skin of his face, or put it into a diffuser. It has a warm orange-and-spice scent, and it’s supposed to improve immune response and help with congestion. I have no evidence for the immune part, but I can testify that it does help open up congested sinuses. Remembering how comforting that scent was to someone suffering from a cold, I added a few drops to the rice and mixed it well. I made sure not to use too much; any essential oil has a powerful aroma, and the orange and cinnamon in OnGuard is especially strong.

When I made the first bunny, I filled the sock about two-thirds full, then sectioned off a large bottom part with my fingers and cinched a thread around the dividing line. This was a little difficult, because the top kept wanting to fall over and dump out the rice. The second time, I ended up pouring out the rice in the top section before tying it off, leaving the heel empty. Then I firmly tied the thread just above the rice. This approach was much easier. I put a dab of fabric glue onto the knot so the kids wouldn’t accidentally untie it later.

I made sure each heel, above the cinched thread, had as much rice as I could pack into it while making sure this section was smaller than the bottom part. I used thread to tie this section off. This time, I used fabric glue both on the knot and on the inside of the sock where the thread pulled it tight, to prevent rice from falling out later.

Next, I oriented the bunny with the round heel, which would be the bunny’s nose and face, toward me. I carefully cut down the middle of the empty top of the sock, with the cut lined up with the center of the heel. I cut away a diagonal, slightly curved piece at the end of each half of the fabric. Now the top of the sock looked roughly like bunny ears. The ears were open and prone to fraying, and I wanted to give them a more finished look. I didn’t have access to my sewing machine, and that miserable cold had exhausted me, so I used the fabric glue one more time. Folding each edge of the ear under, I ran a line of glue along one side and used clothespins to hold the edges together, and let the bunny dry overnight. Besides making the ears more durable, securing the edges also gave them a more defined, less floppy look.

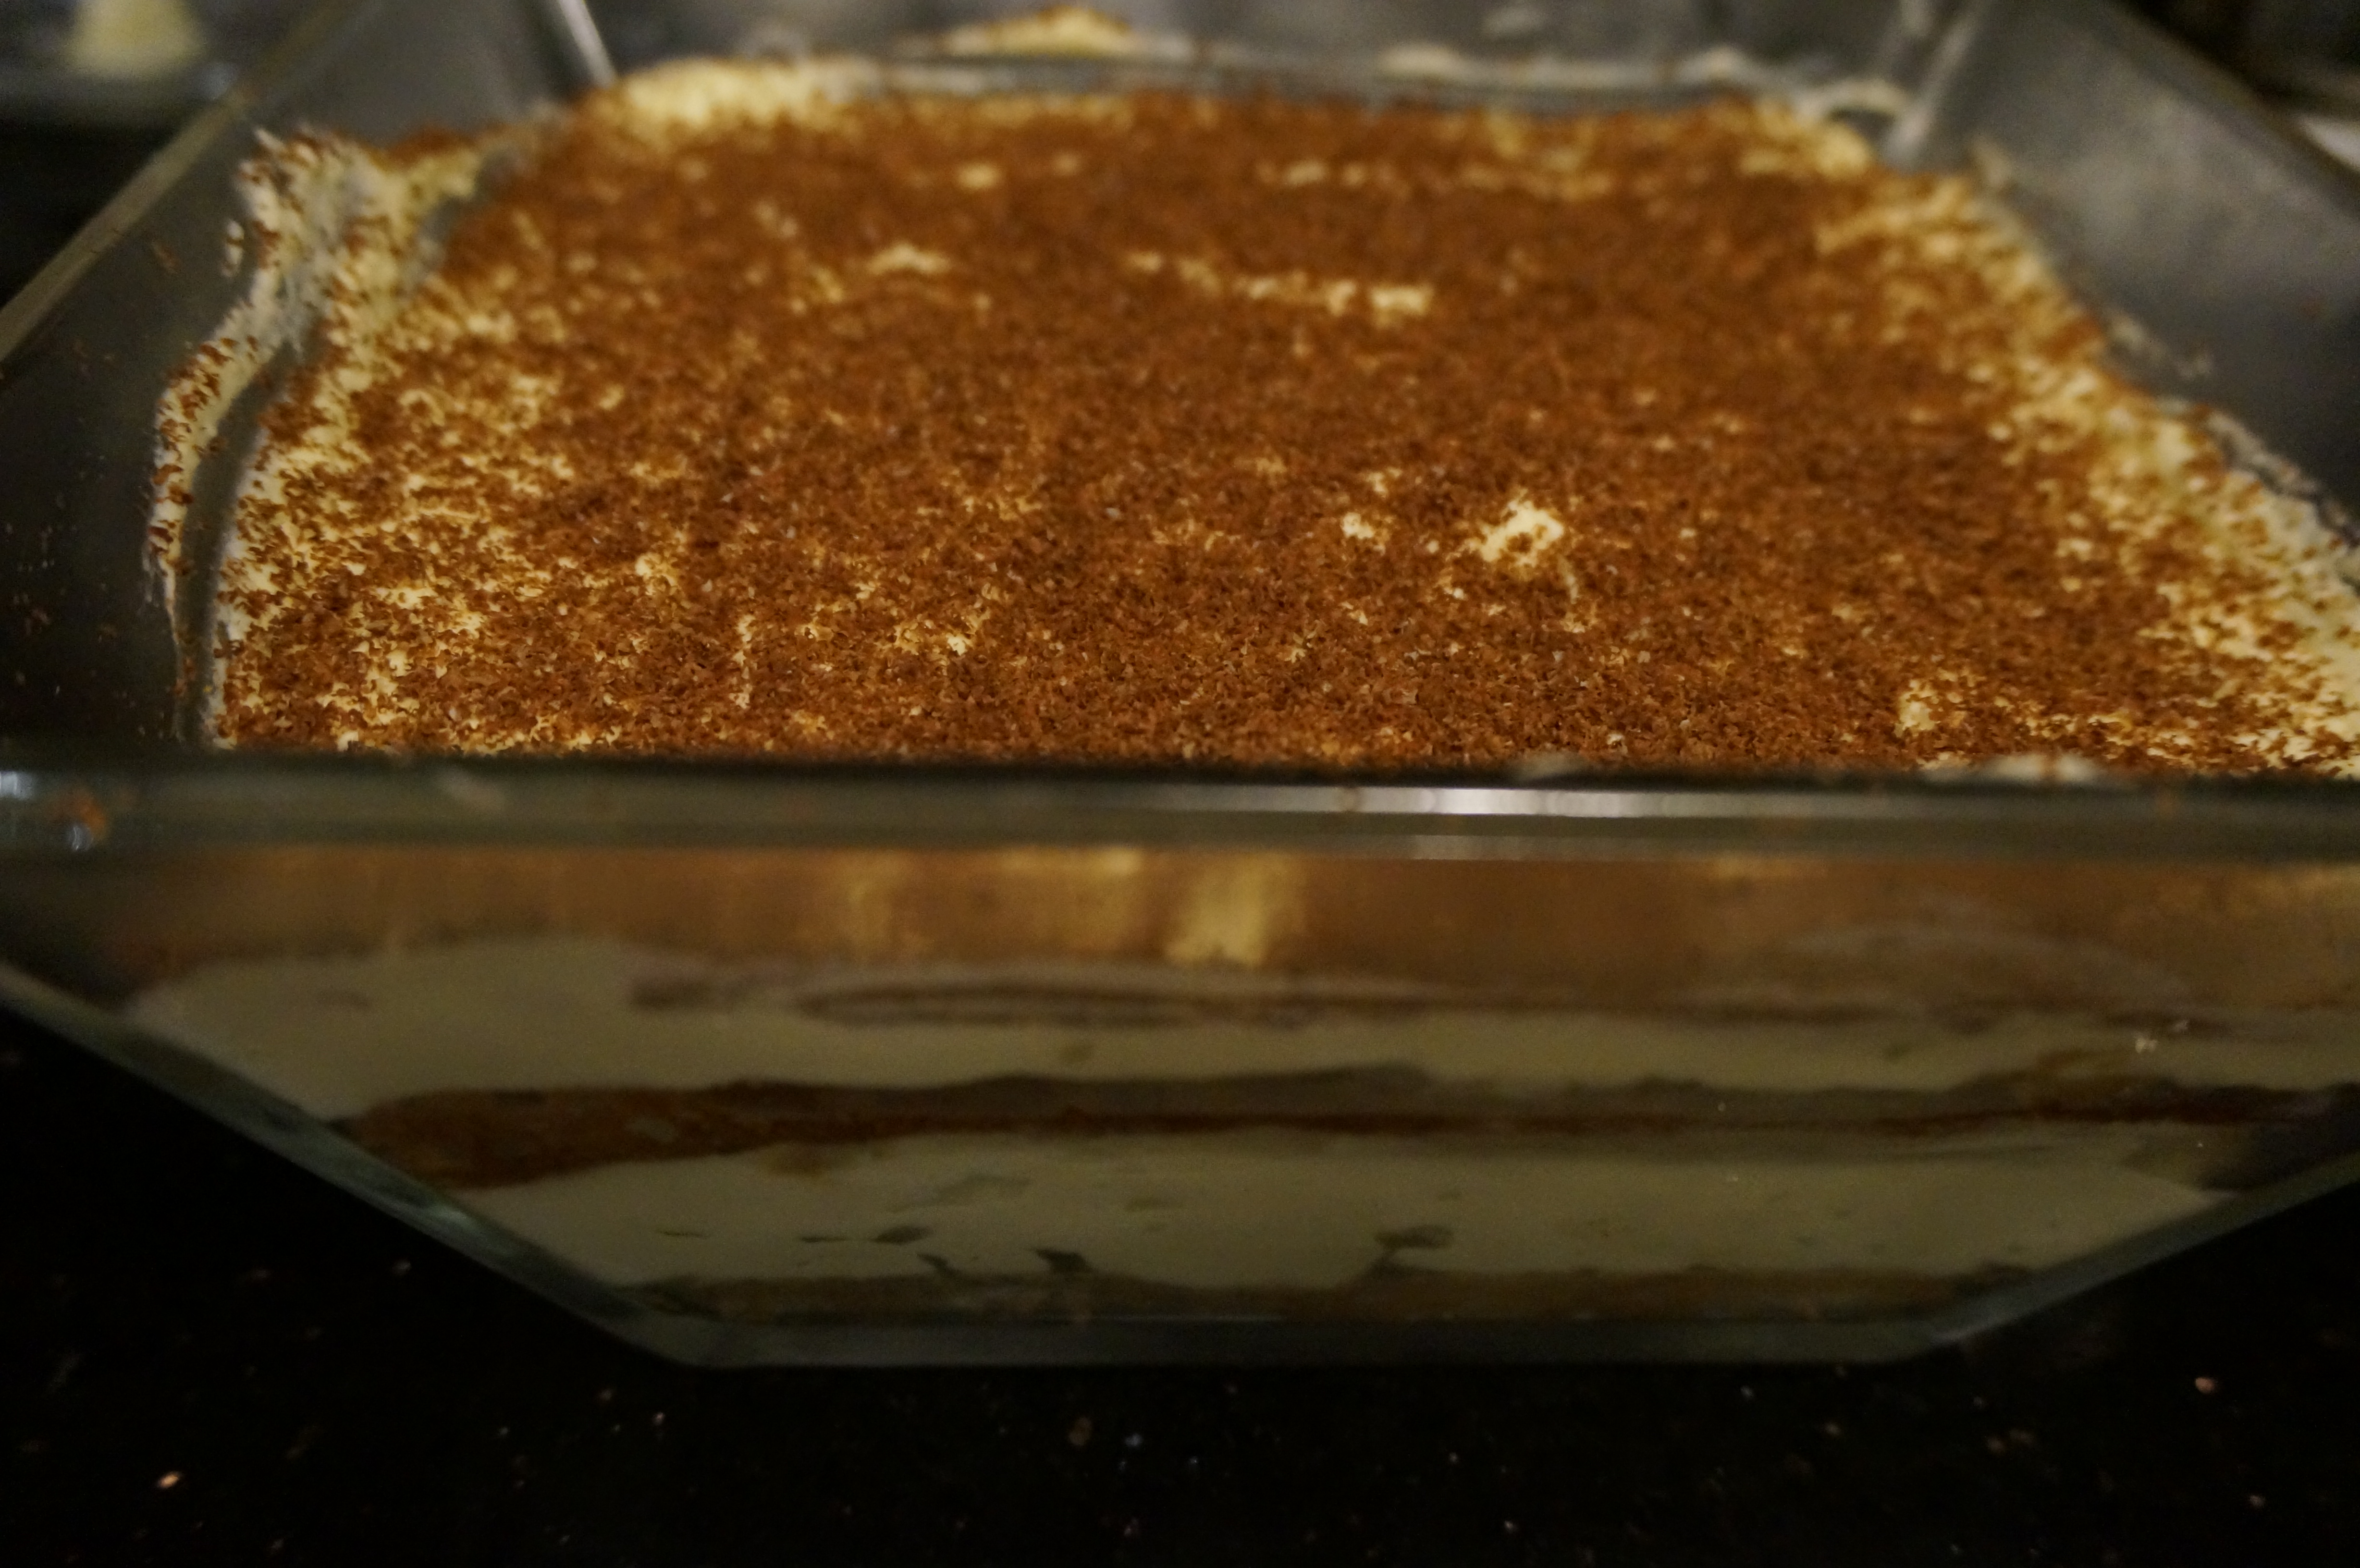
I’d put off my project so long that the next morning was Easter. Before the kids woke up, I got out my fabric markers and gave each bunny a face on the rounded heel of the sock: eyes, heart-shaped nose, and smiling mouth. I tied some ribbon over the thread that defined the neck,  with the fluffy bow just under the bunny’s chin. I finished just in time to add a bunny to each Easter basket.DSC01213

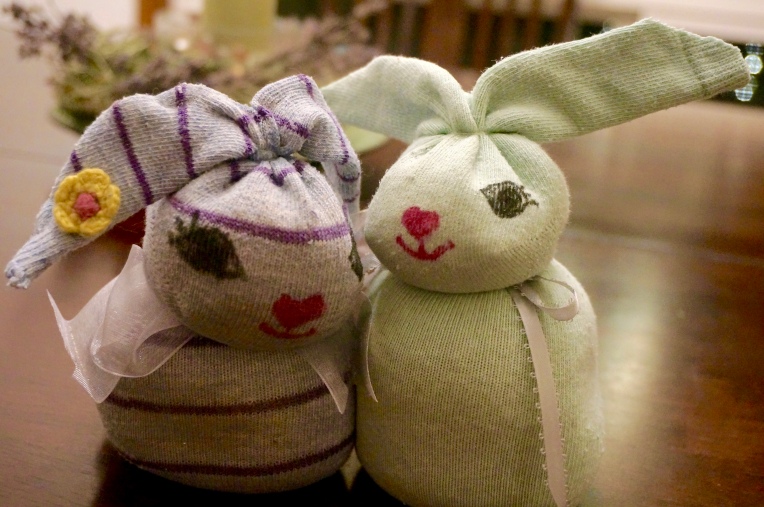
I was gratified by the kids’ responses: they immediately hugged them, and Niko was instantly reminded of his babysitter. He said, “It smells like Joey!” as he inhaled deeply. Despite how rushed the end of the project had been, I was satisfied.

A year later, I’m pleasantly impressed with how much sturdier the bunnies are than I’d expected, given that they are held together with ribbon and glue. I had to mend each one recently because Niko bit holes into them (yes, really), but the construction remains intact. And both kids still adore them and ask for them to be warmed up at bedtime, even though they each have a store-bought microwaveable toy. It was a project that was both insanely easy and durable, which is a win in my book.


Advertisement

“Oops!”: Time For Honesty

Lately, I’ve been considering honesty in my writing. It’s not so much that I’m concerned about a personal habit of lying. It’s more that I suspect I may be guilty of contributing to a common Facebook phenomenon: by presenting only the best of my life, my stories may make readers feel inadequate.

Let me give an example. On November 30, I posted a glowing report of writing 50,000 words of my very own novel! Some of my friends shook their heads and marveled at my accomplishment. How on earth do you do it all? they wondered. Well, it’s time for honesty. For the entire month of November, I folded laundry once. That’s right. By the end of November, I had three weeks’ worth of unfolded laundry piled in baskets, overflowing onto my washing machine. I also allowed my kids to watch far too much TV. I neglected the garden, and left the kids (and myself) in PJs for large portions of the day. I didn’t have my son write thank-you cards for his birthday gifts — a fact brought home by the arrival of a thank-you card from a friend whose birthday was a few weeks after his.

Here’s the truth: every time I accomplish something of which I’m proud, something I wish to share with the world, or even just any task outside my daily routine, something else remains undone. Yesterday I worked my way through nine months’ worth of photos, deleting 1600 of them as I went, and I also wrote a post for this blog. What that means is that I failed to accomplish the following jobs: folding this week’s clean laundry, emptying and refilling the dishwasher, sweeping the floor, vacuuming the carpet, cleaning dog-nose-slime off the window, filling out paperwork to renew the tags on our car, and watering my baby beet seedlings. Oh, and helping Niko write thank-you cards!

All of these ponderings on honesty have been simmering on the back burner of my mind for some time now, until this morning when I came across a WordPress tool I didn’t know existed: a weekly writing challenge. This week’s challenge is “Oops!” The goal is to post a story that includes a photo that is decidedly not Instagram- or Facebook-worthy. The challenge jogged my memory of a photo I took some time ago — a failure of perfection.

So, my dear readers, here is my “oops” moment. The setting is the making of a batch of cinnamon-swirled bread from my own recipe. I shared a photo of my loaves on Facebook but didn’t end up making a blog post from it, because I didn’t knead the dough enough and the odd texture shows up clearly in the photos. Also, even though I included cinnamon in this particular attempt, I didn’t use enough, so it just shows up as a faint streak in the sliced bread. I didn’t know any of this as I was making the bread, of course, and I was planning to write up the recipe for my blog, so I was taking photos as I went. In the photos, there’s no hint that anything is amiss. The counter is clean and shiny, and the bread practically glows with homemade goodness.

However, as I was photographing all this domestic bliss, I happened to step back and take a look at my kitchen. Oh. My. God. It was a disaster. The only clear space on the counter was the one I’d cleared for photographing the bread! The floor was unswept. The sink was piled with dishes. Just awful. On impulse, I snapped a picture. In fact, this is far from the worst my kitchen has been when I’m in the throes of creativity, but it’s the only photo I’ve taken of the mess.

But, honestly, that’s my life. If I’m putting extra time into writing, or cooking something special, or making an interesting project, other things are left undone. I’ve learned to accept that. I can catch up while the kids nap or after they go to bed, or I can set aside a day later in the week to focus on cleaning, or whatever it takes to recover from a day of focusing on projects.

Still, the truth is that this mess-making and catching up doesn’t show in my blog posts or Facebook status updates, and too much of that kind of omissions constitute a dishonest representation of my life. It would be easy to read the highlights of my life and see a perfect mom and housewife, gliding through life with grace and good humor. Nope. Not me. I’m the one with a disaster of a kitchen and stacks of unfolded laundry, sitting the kids in front of the TV so I can finish my project, and clearing six square inches of counter space to take a photo worthy of showing off. That, my friends, is the truth. I’m normal, human, disorganized, messy. Far, far, far from perfect.

I’m taking this opportunity to push back against the deluge of Facebook perfection. I don’t want to contribute to someone else’s sense of inadequacy. We all struggle; we all make compromises. We’re in this together, even if our social media accounts indicate otherwise.

Birthday Electrician

A month ago, I celebrated a birthday.

Well, actually, I spent my birthday cuddling my 15-month-old in bed while we both tried to recuperate from a miserable flu, while my husband wisely took our son out for a father-son outing so I could have a quiet house. By the time he got home, he was feeling the first symptoms of flu himself, but he still managed to finish assembling a creamy, light, espresso-and-rum-soaked  birthday tiramisu, which he’d started early that morning. He spent the following morning in bed while I was starting to feel a little more like myself, and then, with a superhuman effort, he made the delicious dinner he’d planned…and then relapsed from having worked too hard, too soon, and spent the next day resting too. We didn’t have a birthday date. We had a birthday week-of-recovery.

Birthday tiramisu.
Birthday tiramisu.

So the day itself wasn’t exactly sublime. But the effort (and the high levels of deliciousness) made me feel pretty special all the same. And despite the all-around misery, Aaron came through with a perfect gift. My birthday present this year was a bit less tangible than usual, but it was the best ever. Aaron hired an electrician to come to our house and install ceiling lights in our tiny attic room, the first step in turning the space into a craft room for me. In less than five hours, he’d fixed faulty wiring that the previous owners had rigged, placed the track lighting I’d chosen in just the right place, and put a bright flat light in a space that was once a window. It’s showing signs of the beautiful room it will become. But more than just an attractive room, it’s a promise. A promise that someday I’ll have a tiny space that is mine, where someday (when kids can be left alone for more than 30 seconds without disaster descending) I will be able to work quietly, alone, and not clean up my mess. It will be a space for ongoing projects, for never-finished projects, for someday once again grading papers. A space for writing and planning. My own spot. An unbelievable luxury.

In the works, possibly to be completed by midsummer: Painted walls in two shades of green (neither of which is the one currently on the walls); wainscoting, which Aaron will build, on the lower half of the wall; a stained-glass window to place over the former window opening; and dark wood flooring. Eventually, storage cabinets and shelves, at waist height so they double as work surfaces.

Sometimes I shake my head in amazement at my good fortune, my blessing, to be married to a man who knows me well enough to know how important it is for me to have both time and space for quietness. Considering that our lives right now don’t allow for much of that, it’s not an easy thing to see — the importance of a quiet place. But he saw it, and acted on it.

I guess this post serves as a very public Thank You to my sweet and perceptive husband. I love you.

Creamy Coconut Hand Scrub

It’s that time of year when gardening hands become permanently begrimed, even through gloves, unless serious action is taken. Around this time of year, I usually mix up my first batch of simple olive oil-and-salt scrub that I keep on the kitchen sink for post-gardening clean-up. This past year, though, I’ve been less satisfied with that basic remedy, and this spring I began experimenting with a better mixture that would be creamier, more moisturizing, and easier to rinse off. I’m happy to say that I finally hit on just the right combination!

This dirt-busting scrub incorporates coconut oil and liquid hand soap, and it really is just about perfect. I use it on my hands as well as Niko’s and Sofie’s. It’s gentle enough to use on little ones, but tough enough to scour off even our iron-rich, clay-based soil. It’s also excellent for cleaning off engine grease and tree sap, and scrubbing off leftover sticky labels from jars! On my own hands, I like to use a bit extra for massaging my cuticles before rinsing it off, because the coconut and olive oils are great for giving dry cuticles a moisture boost.

The recipe I’ve given here makes a small batch. I recommend starting small until you see how fast you use the scrub, especially if you’re making it during warm summer months. It doesn’t happen often, but I have had a similar mixture turn rancid after a couple of months in a hot kitchen without air conditioning. I recently made a batch about three times this one, because our family uses it pretty fast.

I like blending salt and sugar because the crystals are different shapes and sizes, so they pack an extra punch as they get into all the crevices of hard-working hands and feet. You could experiment with other crystal sizes, like fine canning salt and coarser sea salt.  Be prepared to adjust the amounts of oil needed. It will fill in the spaces between larger and smaller crystals differently: the finer the crystals are, the more oil you’ll need.

Crystals of different sizes: fine canning salt, coarse sea salt, and table salt.

To make this easy hand scrub, start by blending one tablespoon of coconut oil with 1/2 cup of salt and 1/4 cup of sugar. Blend till there are no lumps of coconut oil left, and then add 1 tablespoon of liquid hand soap and 3 tablespoons of olive oil. Blend thoroughly. It should look smooth and creamy, with maybe a little olive oil pooling around the edges if you stop stirring. The pooling is just fine — if you use less oil, it will settle below the surface, making the scrub harder to scoop.

A creamy scrub.
A creamy scrub.

Before storing the scrub in a bowl or jar with a firmly-fitting lid, you could add a few drops of essential oils for scent or for extra cleaning or healing power. My go-to oil mix is a few drops of lemon, which is a good cleanser and has a fresh, cheerful scent, and a couple of drops (not too much!) of lavender, which will soothe dry or irritated skin. With my most recent batch, I used DoTerra’s OnGuard blend, an orange-cinnamon blend that’s supposed to boost your immune system’s efficiency. The orange oil, like lemon oil, is an excellent cleaner, and the warm cinnamon smell makes it perfect for a kitchen scrub. In addition to the essential oil, if you have jojoba oil on hand, a drizzle of that will be even more moisturizing and healing for chapped skin.

An assortment of ingredients for a creamy hand scrub: olive oil, hand soap, coconut oil, salts, essential oils, and jojoba oil.

This creamy scrub is getting some heavy use in our house! I hope you enjoy it as much as we do.

Garden Planning

On Friday, Aaron said to me, “We should start planning what we want to plant this year.” And I said, “Oh, right, I meant to make something for that!” Because, as I so often do, I had had a brilliant idea for garden planning, but then I’d forgotten my brilliant idea. (Have I mentioned that a common characteristic of people with ADHD is forgetfulness?) Aaron’s comment jogged my memory just in time.

My brilliant plan had originally been to create a spreadsheet that listed the plants we already have, plus those we want to plant, with their key data: when to plant, what type of soil, best light, when to expect blossoms or fruit. I even thought of adding more details for flowers: average plant height, flower color, foliage color, and so on, for visual planning. In a spreadsheet, I thought, I could then easily organize by, for example, planting time, and voila! My spreadsheet would become a planting calendar. Or I could choose to order it by soil type to help me decide where to plant, and so on.

As I so often do when considering my brilliant ideas, I quickly realized that this one might be a tiny bit beyond my reach, at least this year, because a) I’m not really that great at creating spreadsheets, and b) this would be incredibly time-consuming. However, several years of teaching has made me REALLY great at designing charts and worksheets, and it occurred to me that if I made a printable chart with space for the same data, I could use it as a planning worksheet right now, and save the filled-in sheet for later…just in case I someday want to create a more complex data entry system for keeping track of plants in our garden.

I ended up making three sheets: one each for flowers, herbs, and vegetables. I may later make one for fruit too, but since we’re not planning on putting in any new fruit this year, that can wait. Each sheet starts with a place to jot down the following climate data: Sunset Climate ZoneUSDA Hardiness Zones (I found that link and information at The National Gardening Association); and the average time of the first and last frosts as well as last year’s first frost and this year’s last frost (you can find this information at Old Farmer’s Almanac and Dave’s Garden, among other places). I included a spot for both the Sunset Climate Zone and the USDA Hardiness Zone because they both provide advantages when planning what to plant. The USDA Hardiness Zone is used most often on plant labels and seed packages, but  it’s not nearly as useful in Western North America as it is in the East. That’s because it only accounts for average winter temperature, not for rainfall or snow. In the western half of the continent, both of those factors heavily impact what types of plants grow best, and both are highly variable over here even when winter temperature averages are similar. The Sunset Climate Zone system does take this into account… but since most plant distributors use USDA data, you have to do a bit more work to discover what plants grow best in each Sunset zone.

Then I added a table with the following headings: When to Plant, Best Soil, Light, Plant With…, Avoid Planting With…, Germination, and Bloom (or Harvest) Time. I’m pretty happy with the way it turned out. I’m leaving it out on the desk so I can quickly jot down plants that I think of, and later I can research to find information about planting, which I can then record as I have time. This is making me so excited! I can hardly wait to get started with planting!

If you click on the title above each chart image, you should get a PDF that opens in a new screen. That way, you can print these charts for your own use. Happy gardening!

Vegetable Planning                                  Flower Planning                               Herb Planning

Baking Soda Freshener

In even the best-kept homes, there might be found an occasional…odor. Nobody likes to mention it, but there it is. Odors. They’re part of life. This is especially true in a home like mine, which contains a baby, a puppy, and a small boy. But even in a home with fewer sources for unpleasant smells, you’ll still find some: in trash cans, refrigerators, old carpets…Smells tend to saturate fabrics or plastic and just hang around.

There’s a solution. It’s inexpensive, nontoxic, and has been used for a long time: baking soda. I sprinkle it into the bottoms of trash cans before adding a bag and over half-filled trash cans, in diaper cans, and over carpets before vacuuming. In the refrigerator and freezer, some baking soda in a little cup can absorb that unpleasant stale smell that can build up. It really is that simple.

But you know me. Simple is great, but sometimes just a little more attention to detail can give even better results. I make an easy mixture that adds a light scent to a room as well as absorbing unwanted odors, and it has the bonus of being a laundry booster as well.

I start with a glass canister with a shaker lid — the kind you see in diners, holding sugar or powdered coffee creamer (ewwww). Fill it halfway up with borax, which, like baking soda, is another odor absorber as well as helping improve laundry detergent efficiency. Then fill it the rest of the way with baking soda. (I always have plenty of baking soda on hand because I buy in bulk, as I use it a lot — for bath soak, laundry stain remover, and other useful purposes as well as baking.) Finally, add a few drops of essential oil and mix it well. I usually use a bit of lavender and some lemon, but whatever you like should work fine. Don’t do too much! Essential oils are very concentrated scents, and you can get an overpowering aroma quickly. Just to give you an idea: I put in 6-8 drops of each oil for this batch, and yes, it was a bit strong.

So, a little pouring, a little stirring, and — Voila! A quick room freshener. Where to use it? I sprinkle it over laundry hampers, over the carpet before vacuuming in Niko’s and Sofia’s rooms (both of which have that distinctive small-child odor), and under Niko’s area rug to release a little scent each time we walk across it. I sprinkle a bit into the Diaper Genie each time I drop in a diaper — we do cloth diapers, and the Genie stores them beautifully before washing. It tries hard to block out odor, but it’s not perfect. The baking soda/borax mixture with a little essential oil helps absorb odor, but it also helps get the diapers clean when I wash them. Anywhere you want a little freshening is a good place to sprinkle some of this.

Fluffy Tutu

Sofia turned one last month, and we celebrated with a cake smash photo shoot. I made a polka-dot cake, decorated a plain white backdrop with a simple birthday banner, and dressed her in a pretty blue-and-silver tutu I made for the occasion. The polka-dot cake was a surprisingly successful learning experience, the birthday banner was an easy last-minute impulse craft, but the tutu is what I’m really proud of.

I had an idea in my mind of how I wanted the tutu to look, but I couldn’t find a tutorial online for one that worked with the materials I had on hand. So I just struck out on my own, designing as I went. I started by pulling out the tulle I had stored away in a bin. I had a swath of pretty, rich, blue tulle, some silver sheer fabric (not really tulle, but I made it work), and lots of white tulle. Then I opened my ribbon box and found some narrow, sheer, silver ribbon. I rummaged through my sewing box till I found a pack of wide elastic. (The silver butterfly in the photo is for a headband that I planned, but didn’t have enough fabric to finish.)

I wanted the tutu to be fairly long. To decide how long to cut my pieces, I put Sofia into a dress she has with a tutu skirt, made a note of where the waist fell, and measured the skirt. The tutu I wanted to make would have a waistband, while the tutu part of the dress we tried on started a bit below her waist, so I added another inch to the length, plus another inch for a seam allowance. For Sofia, that put the desired fabric length right around 8 inches. I used her body to measure my elastic waistband, too. I didn’t want the elastic to have to stretch in order to go around her waist, so I just circled her waist snugly with the elastic and cut it to that length.

To make a layered look that showed off the blue and silver, I cut each piece 4 inches wide. I didn’t have a whole lot of the blue and silver. I just kept cutting until I ran out, then cut about as much white as I had of both blue and silver. On my dining table, I laid out my strips in alternating, overlapping colors: white, blue, white, silver, white, blue… I arranged them so that each one overlapped the previous by about half its width.The white was barely visible, but it added needed bulk. My goal was to have a row of overlapping fabric that was about twice the length of the elastic I’d cut for the waistband, but I didn’t end up having that much on hand. If I’d planned ahead, of course, I could have calculated how much I needed and purchased accordingly. (This is what we call Crafting With ADHD. Seriously. It usually works out anyway.)

Once I’d laid out the whole array of fabric, I used matching blue thread to baste the fabric pieces together. Basting is stitching in such a way that the thread is easily pulled, either for temporarily holding fabric in place, or for gathering. I started by pushing the needle all the way through the first layer of fabric, drawing the thread through, then tying a firm knot in the end so it wouldn’t come pulling out prematurely. Then I alternated long stitches and short stitches (but not tiny ones — that would make the thread hard to pull later), making sure to catch each strip of fabric at least once. I basted all the way across, and then laid out the elastic band next to the fabric. Finally, I gathered the basted fabric together by gently pulling on the loose end of the thread, pushing the fabric back toward the knotted end, until the width of the basted-together fabric matched the length of the elastic. To secure the fabric, I quickly stuck a pin into each end of the fabric to hold it to the elastic.

Next, I turned the whole thing over and pinned the fabric to the elastic with sturdy quilting pins, folding the fabric over the elastic with a bit left over to tuck under. I put a pin every few inches. Since the fabric was already basted and gathered, I didn’t need a lot.

With the fabric pinned down, I used a needle and the blue thread to hand-stitch the fabric over the elastic. I used what I was taught to call a blanket stitch, though it’s actually more of a hybrid between the blanket stitch and a catch stitch. (The first link in the previous sentence goes to an instruction manual from Coats & Clark, 1959, and has instructions for both stitches; the second one is a more detailed tutorial for the catch stitch.) Using my thumb as a guide for stitch width, I pushed the needle down and back up in a right-to-left direction at the end of each stitch, then looped the needle through the stitch to secure it before the thread pulled all the way through. Setting the end of the stitch backward like that, plus catching the thread in a loop, makes this a very secure stitch. I just barely caught the front layer of fabric with the needle — the stitches don’t show at all. Each stitch caught the very edge of the elastic fabric, keeping it secure so it didn’t roll inside the waistband. Finally, I whip-stitched the two ends of the elastic band together. Stitching the waistband took me about twenty minutes.

If you have a good sewing machine and don’t mind the stitching showing through to the other side, you could just machine-stitch it, but I wanted invisible stitches — and, having been raised without electricity, I’m more comfortable with hand-stitching anyway. I should also add that this is NOT a good method to use if you want the elastic to stretch a lot. I fit the elastic band to sit gently on Sofia’s waist, so it only has to stretch a little as it goes over her hips — stretch it too much, and the stitches will start snapping. If you wanted the elastic to fit more snugly, you would stretch a shorter elastic length over the ungathered, basted fabric, pin along its length, and release it, letting the elastic do the gathering.

At this point, I could have been done. However, I didn’t think the finished product was as fluffy as I’d wanted.  If I’d had more fabric and could have gathered the tulle more tightly, or added another layer or two, it might have been fine. But I really wanted more pouf. I remembered a pretty tulle fairy dress I’d seen when searching (in vain) for a tutorial. The creator had used little tulle pieces to tie off the ends of the long tulle strips, and it had made a deliciously frothy bottom of the skirt. I knew I couldn’t recreate the look with what I had, but it did give me an idea for something a little similar. I used blue tulle pieces to tie off the white and silver strips, and silver ribbon to tie off the blue tulle. And voila! A sweet little tutu was born.

Birthday Polka-Dot Cake

Sofia turned one during the second week in December, and we decided to do a cake smash celebration with her, like we’d done when Niko turned one. I wanted a cute cake for her to smash that would coordinate with a perfect outfit for marvelous pictures. Aaron suggested that I make a polka-dot cake. I was mildly hesitant, because it seemed complex, but when he showed me a cake pop pan he’d found, I decided it seemed doable.

It was simultaneously easier and harder than I’d expected. First, of course, I did a search for how to make a polka-dot cake. I found a blog called “Once Upon a Pedestal,” by Deborah Stauch, which featured a tutorial for a polka-dot cake. Later on, after I’d gone through the whole process of making the cake, I found another blog, “Easy Baked,” which had a polka-dot cake tutorial that included some troubleshooting ideas that the original post didn’t have. This one was actually referenced by Ms. Stauch, and the author used Ms. Stauch’s instructions for her own cake. I wish I’d seen it when I was originally looking, because I ran into some problems.

Basic steps: Use two cake mixes; color one batch however you want your polka dots; bake your cake pops till they’re just done; surround them with the second batch of batter in layer pans; bake them a second time. Simple. Easy-peasy. Right? Ha.

The tutorial I followed suggested adding pudding mix to the cake mix. The idea was that this would make the cake denser, and the circles would be less likely to float. Unfortunately, what I thought was pudding mix in my cupboard was, in fact, Jell-O mix. Then I realized that my cake mix was a pudding cake. Problem solved! I thought. Ha.

Another instruction I didn’t follow was to use two cake mixes. I only wanted to make two layers in itty-bitty pans, not the three layer pans that the original tutorial suggested, so I thought one mix would be just fine. Incidentally, upon measuring (later, of course), I discovered that my mini pans were the same size as the pans Ms. Stauch used: six inches across. So one mix wasn’t enough even for my two pans. My guess is that if I’d done two, I’d have had enough to do seven balls per layer, rather than six, and also cover them more thoroughly in the pans.

I mention these errors just in case someone else reading this thinks taking shortcuts is a great idea. I think the cakes would have been MUCH easier, and looked better, if I’d just followed the instructions. What actually happened: the batter didn’t sufficiently cover the cake balls, and they floated up above the surface of the cakes. I salvaged them by covering them with a damp paper towel and setting another pan on top. It worked okay, but it could have been better.

Anyway, the end result was surprisingly pretty, considering all my mistakes. I measured out enough batter for the balls and tinted that batch with Wilton Moss Green gel coloring. I tinted the rest with Wilton Creamy Peach gel coloring. I baked the balls first, of course. Using my 12-ball Nordic Ware cake pop pan, I baked them for exactly 12 minutes at 350 degrees. This was the one thing that worked perfectly. They came out a beautiful soft green with not even a touch of brown, and all but one popped out of the pan without a hitch. You can see how they looked in the photos below.

Then I poured a little bit of the peach batter into the 6-inch baking pan (actually too much batter — it pushed the balls upward as it rose), arranged 6 balls in each pan, and poured the rest of the batter over. As you can see in the photos below, it really wasn’t enough batter to thoroughly cover them. A little more would have been better. I then baked the cake just like a normal cake. Afterward, I had to weigh down the top for 10 minutes, using a damp paper towel topped with another pan, to press down the round top with protruding green balls. This wouldn’t have been necessary if I’d just followed the directions.

I used whipped cream for the topping and filling. I used the peach for this, too. I used a flat metal spatula (like a giant butter knife), dipped in hot water, to smooth the sides. I’m not an expert; it didn’t turn out perfectly smooth, even though I spent an inordinate amount of time in the attempt. But it looks a lot better than it did before Aaron, who’s actually got some experience with cake decorating, suggested the hot-water method. Then, for the top, I used a flower tip on a pastry bag to make little flowers all over, and I dropped a pale-green sprinkle into the center of each flower. For a final touch, I poured more sprinkles around the bottom of the cake to make an irregular band of pale green.

It was a bit of an anxiety-causing process, doing all this work decorating a cake that I couldn’t be sure would look pretty when I cut into it. And I had no backup plan, of course. When I finally cut into the cake just before getting Sofie dressed for the cake smash pictures, I was so relieved at seeing how well it turned out. Polka dots in more or less appropriate places, colors complementary to each other, no horribly obvious flaws, and it looked adorable with the tutu and birthday banner I made for the occasion. Whew!

Birthday Banner

Sofia just had her first birthday, and we celebrated by dressing her in a tutu and smashing a cake. Of course I needed pictures, so I set up a sheet for a plain background. We’ve done this before, for Niko’s one-year-old cake smash and for family photos, and it’s seemed fine. But this time, as I looked at the white sheet draped against the fireplace, it just looked…inadequate.

I was feeling a bit doubtful about the photo shoot, anyway. I’d made Sofie a pretty blue-and-silver tutu and had considered making a matching blue polka-dot cake, but I let Aaron talk me into doing a more girly peach and green cake. I wasn’t sure how the photos would look with two completely different color schemes.

And then, inspiration hit — during my two hours home during Niko’s preschool morning, of course, on the morning of the day I planned to take Sofia’s pictures. There’s nothing quite like a deadline to inspire. What I needed was, of course, a sweet birthday banner pulling three of the colors together. Out came my big pad of  12×12 scrapbook paper. I found three pages that were just right — a soft peachy orange stripe, and two subtly patterned pages in a pretty blue and mossy green.

Then I went to the computer and found a font that could easily be converted to an outline — Marker Felt. I enlarged it to 250 point, changed it from black to empty outline, and printed it out: “ONE YEAR OLD.” If I’d had my craft stuff properly organized, I’d have done this on my Cricut cutter. But printing it and then cutting out the letters worked just fine. After I cut the letters, I cut triangles from the colored paper. I made sure they were identical by folding the paper into quarters, then cutting diagonally. With the font size I chose, this made just the right size of triangles.

Next, I glued the cut-out letters to the triangles, using stick glue so the letters didn’t get bubbles or become warped. I got some pale green narrow satin ribbon out of my box of crazily tangled ribbons (pausing to re-skein and sort them), and measured it against the fireplace wall to make sure I had enough length. I carefully glued the triangles along the ribbon, spaced to make two swags. Then I hung it across the white backdrop. It took a few tries to get it balanced just right, but I managed it… just in time, too, because 11:00 came just as I was tying it off, and I had to leave to go bring Niko home from preschool. The whole project took exactly an hour and a half, and that included nursing Sofie, changing her diaper, and rescuing ribbons and paper triangles repeatedly from her curious fingers.

When I sat Sofie in front of the backdrop with her cake, I felt an exquisite relief: The birthday banner accomplished its hoped-for task of pulling together the disparate colors. It made a bright, cheerful setting for the first-birthday photos. Success!