
At some point in my late teens, I came across a recipe for Christmas tree-shaped coffee cake. My family didn’t celebrate Christmas, but I fell in love with the recipe and made it anyway. It turned out to be a hit, and I’ve made it nearly every year since.
I can’t remember now where I found the original version of this recipe. It’s scrawled in my embarrassingly cute recipe journal, which is pink and enlivened with a photo of kittens on the cover, and I recorded it before I began my habit of referencing the sources of my recipes.
I’ve altered it somewhat from the original over the years. I use the original recipe for the dough, but since the recipe made two huge tree-shaped coffee cakes, I now cut it in half to be more reasonable for a small family rather than a large gathering — in fact, this year I’ll use this half-sized recipe to make two small ones instead of a single large cake, and freeze one for New Year’s morning. Besides adjusting the amount of dough, I tweaked the original filling, adding spices and dried fruit and increasing the overall amount. So, while I do wish I could give credit to the original creator, the evolution over the years is enough to erase any compunction I might feel for failing to cite my sources.
This sweet treat is more like an elaborate, decorative cinnamon roll than the coffee cake I grew up with, which was a cross between a quick bread (like banana bread) and a cake, with a cinnamon streusel topping. Instead of baking soda, this coffee cake uses yeast, and it needs to be made the afternoon before you’re planning your breakfast to give it plenty of time to rise overnight.
You may scroll all the way to the bottom to read a more concise version of this recipe, and print a PDF.
Start by collecting your ingredients:
Dough:
- 3/4 cup milk
- 1/4 cup butter
- 1 egg
- 1/4 cup sugar
- 1 teaspoon salt
- 1 tablespoon yeast
- 2 1/2 – 3 cups flour
- Oil or cooking spray
Filling:
- 1 cup sugar
- 1 tablespoon cinnamon
- 1/2 teaspoon nutmeg
- 1/4 teaspoon ground cloves
- 1/4 cup melted butter
- 1/4 cup chopped nuts
- 1 cup dried fruit, chopped
- 1 tablespoon melted butter (for brushing onto the dough)
Glaze:
- 1 cup confectioner’s sugar
- Water or milk
- 1/2 teaspoon vanilla
- Maraschino cherries, for garnish
Royal Icing (optional)
- White of one pasteurized egg (one ounce)
- 1/2 teaspoon vanilla
- 1 1/3 cup of powdered sugar
You’ll mix and knead the dough and shape the coffee cake the night before you want to eat it, so be sure to plan enough time — and enough refrigerator space to let it rise overnight!
Start by getting the dough ready. Heat the milk and butter together in the microwave. In my microwave, about a minute and a half is enough to warm the milk without scalding it. The butter won’t be completely melted — let the mixture sit on the counter a few minutes, and the butter will finish melting while the milk cools slightly. You don’t want the milk to be hot, just warm. Hot milk will curdle the egg and kill the yeast.
While the milk cools, mix your dry ingredients in a medium bowl: 2 cups of flour, sugar, salt, and yeast. You’ll add the rest of the flour later.
Lightly beat your egg, and stir it into your milk and butter mixture, after testing to make sure the milk is just warm. It should be just a bit warmer than body temperature — a shade warmer than a baby’s bottle. If you drip a bit onto your wrist, you’ll feel warmth without getting burnt.
Stir the milk mixture into the dry mixture to make a sticky dough — you may need to use your hands to get all the flour incorporated into the dough.
This is a good time to point out that you can do this whole process using a stand mixture, if you want, from mixing the dry ingredients to kneading the dough. I would use the paddle attachment at first, and then change to the hook for kneading. However, I prefer to knead by hand, partly because I’m a traditionalist and partly because I think you get a better feel for the texture of the dough when you use your hands. My husband likes to use the mixer, because you can use the highest setting and get the kneading over with quickly.
Once the dry ingredients and milk are mixed, sprinkle about a quarter of a cup of flour onto a clean counter and turn the dough out onto the flour. Sprinkle another quarter cup on top, and knead the dough. To knead, use both hands to press down on the dough, fold it toward you, and give it a quarter turn before repeating the process. Continue kneading for about ten minutes (or as little as five minutes if you’re a very vigorous kneader). Add more flour as needed, sparingly — too much will make the dough feel dry when it’s baked. When the texture of the dough becomes firm and springy, it’s been kneaded enough. It’s not the addition of flour that causes the texture change so much as the kneading. Working the dough causes the wheat gluten to form, which is responsible for giving it the elastic feeling of a yeast bread.


When the dough has been kneaded to an elastic consistency so that it springs back when you press it, form it gently into a ball. Lightly oil a bowl (I just use the one I mixed the dough in), drop the ball of dough in, and then turn it over once so that it’s covered with oil. Place a cloth over the bowl and set it aside to rise for about an hour, until it’s doubled in size. The warmer the place you leave it, the faster it will rise — just don’t put it in a hot place, or the dough will start to bake and the yeast will die off.
While the dough is rising, make your filling. Start by chopping your dried fruit. What fruit you use is really your choice. Last year I used golden raisins, cranberries, pineapple, apricots, and papaya, along with pecans. This year I’m using dried cherries, cranberries, mangoes, dark raisins, and hazelnuts. The dried fruit, combined, should come to about a cup, and the chopped nuts should be about 1/4 to 1/2 cup.


Combine the sugar and spices. Add the melted butter and combine completely, then stir in the chopped fruit and nuts.
When the dough has risen until it’s doubled in size, the coffee cake is ready to shape. Give the dough a good punch to make it collapse. Then turn it out onto a lightly floured counter. Lightly flour a rolling pin, and roll the dough out into an isosceles triangle with a 12-inch base and 15-inch sides. I use the length of the rolling pin as a guide for the length of each side.


Once you have a good triangle shape, brush the dough with about a tablespoon of melted butter. Cover the dough evenly with the filling, leaving space along the edges.


Bring the sides together, pinching the filling-free edges firmly together to make a tight seam. Seal the bottom as well so filling doesn’t fall out when you transfer it to the pan. The best way I’ve come up with to get it from the counter onto the pan is to slide a rigid plastic sheet dusted with flour underneath the filled triangle (I use the plastic placemats my kids use for play dough), and then support it with a hand underneath and a hand on top as I quickly turn it over, seam downward, onto the oiled baking sheet.
Now, lightly score a guide line down the center of the triangle, from peak to base. Use sturdy kitchen scissors to cut slices into each side, ending about a quarter inch from the line. I made eight cuts in the one above. You could do more for smaller slices, but fewer cuts would make the slices too wide to easily do the next step.
Starting at the bottom, give each slice a firm downward twist, toward you (assuming you’re at the base of the triangle). Twist each one so that the filling is visible, and the ends are tilted forward slightly. Cover the tree lightly with plastic wrap, and place it into the fridge to rest and rise overnight.
In the morning, turn on the oven to 350, pull the coffee cake out of the fridge, and let it come to room temperature on the counter while the oven heats. If you have enough time, give the coffee cake a good half hour to rest before putting it into the oven. (It’s not going to make a big difference, but it will be slightly lighter in texture if it has time to warm to room temperature before baking.) Bake it at 350 for 20-30 minutes, till the bread is golden-brown and the filling is sizzling.
Allow the coffee cake to cool slightly while you mix the glaze or icing. To make a basic glaze, sift the powdered sugar into a measuring cup with a pour spout, then drizzle milk or water in, whisking, until it’s a thick, smooth, pouring consistency. Add vanilla. (Another option, especially if you used cranberries in the filling, is to use orange flavoring and add some orange zest.) Drizzle the glaze over the coffee cake in a decorative pattern. This type of glaze won’t show up much — it will soak into the warm coffee cake a little. Add colorful maraschino cherries, cut into halves, or bright-colored candied fruit, to give the effect of ornaments on a tree. I’ve always used both red and green cherries until last year — I’ve been unable to find green ones for the last two years. Maybe you’ll have better luck.
If you want your coffee cake to have a bright white icing like mine, use a royal icing instead of (or on top of) the glaze. I had some left over from decorating gingerbread cookies, so I used that for the coffee cake, with a very pretty effect. The recipe I’m giving here is Alton Brown’s recipe for royal icing, reduced to a third. A quick note: I was able to do the full sized recipe in my stand mixer with the whisk attachment, but the egg whites barely met the whisk at first, until I tilted the bowl upward. Once the whites got fluffy, it was fine. The single egg white won’t fill the mixer bowl enough for the whisk to do the job. To do this smaller recipe, use a hand mixer and a bowl.
To make royal icing, use one ounce of pasteurized egg white (the equivalent of one egg white). Beat it with a hand mixer, together with the vanilla, until it’s fluffy and white. Gradually add one and a third cups of icing sugar, beating at low speed. Once all the sugar is mixed in, continue beating at high speed until the icing is glossy and stiff. Use a plastic bag with a tiny corner snipped off, or an icing bag with a piping nozzle, or even a spoon, to drizzle over the coffee cake in a pretty design. Then add the candied cherries. The icing will harden fairly quickly and will retain its bright white look.
Click here for a printable PDF of the recipe:Tannenbaum Coffee Cake
Concise recipe format: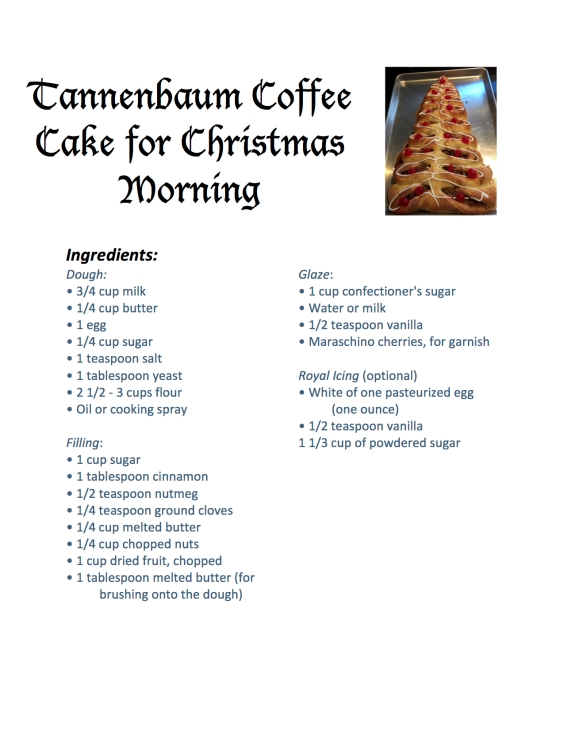

What a fun project You’re full of great ideas, but then you also come from an awesome talented heritage.
LikeLike